Android 意圖(Intent)和過濾器(Filter)
Android意圖是一個要執行的操作的抽象描述。 它可以通過startActivity 來啟動一個活動,broadcastIntent 來發送廣播到任何對它感興趣的廣播接受器組件,startService(Intent) 或者bindService(Intent, ServiceConnection, int) 來與後台服務通訊。
意圖本身(一個Intent 對象)是一個被動的數據結構,保存著要執行操作的抽象描述。
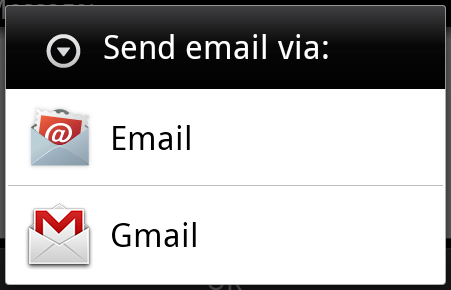
例如,你有一個活動,需要打開郵件客戶端並通過Android 設備來發送郵件。 為了這個目的,你的活動需要發送一個帶有合適選擇器的ACTION_SEND 到Android 意圖處理者。 指定的選擇器給定合適的界面來讓用戶決定如何發送他的郵件數據。
Intent email = new Intent(Intent.ACTION_SEND, Uri.parse("mailto:"));
email.putExtra(Intent.EXTRA_EMAIL, recipients);
email.putExtra(Intent.EXTRA_SUBJECT, subject.getText().toString());
email.putExtra(Intent.EXTRA_TEXT, body.getText().toString());
startActivity(Intent.createChooser(email, "Choose an email client from..."));
上面的語法調用startActivity 方法來開啟郵件活動,代碼運行結果看起來像這樣:
例如,你有一個活動,需要在Android 設備上通過瀏覽器打開一個URL。 為了這個目的,你的活動發送ACTION_WEB_SEARCH 意圖到Android 意圖處理器來在瀏覽器中打開給定的URL 。 意圖處理器通過解析一系列活動,並選擇最適合你的意圖的一個活動,在這個例子中,是Web 瀏覽器活動。 意圖處理器傳遞你的網頁地址到Web 瀏覽器,並打開Web 瀏覽器活動。
String q = "http://www.uprogrammer.cn";
Intent intent = new Intent(Intent.ACTION_WEB_SEARCH );
intent.putExtra(SearchManager.QUERY, q);
startActivity(intent);
上面的例子將在Android搜索引擎上查找"www.uprogrammer.cn",並在一個活動上給出關鍵詞的結果。
對於每一個組件-活動,服務,廣播接收器都有獨立的機制來傳遞意圖。
| 序號 | 方法和描述 |
|---|---|
| 1 | Context.startActivity():意圖傳遞給該方法,用於啟動一個新的活動或者讓已存在的活動做一些新的事情。 |
| 2 | Context.startService():意圖傳遞給該方法,將初始化一個服務,或者新的信息到一個持續存在的服務。 |
| 3 | Context.sendBroadcast():意圖傳遞給該方法,信息將傳遞到所有對此感興趣的廣播接收器。 |
意圖對象
意圖對像是一包的信息,用於組件接收到的意圖就像Android 系統接受到的信息。
意圖對象包括如下的組件,具體取決於要通信或者執行什麼。
動作(Action)
這是意圖對像中必須的部分,被表現為一個字符串。 在廣播的意圖中,動作一旦發生,將會被報告。 動作將很大程度上決定意圖的其他部分如何被組織。 Intent 類定義了一系列動作常量對應不同的意圖。 這裡是一份Android意圖標準動作列表。
意圖對像中的動作可以通過setAction() 方法來設置,通過getAction() 方法來讀取。
數據(Data)
添加數據規格到意圖過濾器。 這個規格可以只是一個數據類型(如元類型屬性),一條URI ,或者同時包括數據類型和URI 。 URI 則由不同部分的屬性來指定。
這些指定URL 格式的屬性是可選的,但是也相互獨立-
- 如果意圖過濾器沒有指定模式,所有其他的URI 屬性將被忽略。
- 如果沒有為過濾器指定主機,端口屬性和所有路徑屬性將被忽略。
setData() 方法只能以URI 來指定數據,setType() 只能以元類型指定數據,setDataAndType() 可以同時指定URI 和元類型。 URI 通過getData() 讀取,類型通過getType() 讀取。
以下是動作/數據組的一些實例-
| 序號 | 動作/數據組和描述 |
|---|---|
| 1 | ACTION_VIEW content://contacts/people/1:顯示ID為1的用戶的信息。 |
| 2 | ACTION_DIAL content://contacts/people/1:顯示電話撥號器,並填充用戶1的數據。 |
| 3 | ACTION_VIEW tel:123:顯示電話撥號器,並填充給定的號碼。 |
| 4 | ACTION_DIAL tel:123:顯示電話撥號器,並填充給定的號碼。 |
| 5 | ACTION_EDIT content://contacts/people/1:編輯ID為1的用戶信息。 |
| 6 | ACTION_VIEW content://contacts/people/:顯示用戶列表,以便查看。 |
| 7 | ACTION_SET_WALLPAPER:顯示選擇壁紙設置。 |
| 8 | ACTION_SYNC:同步數據,默認的值為:android.intent.action.SYNC |
| 9 | ACTION_SYSTEM_TUTORIAL:開啟平台定義的教程(默認教程或者啟動教程) |
| 10 | ACTION_TIMEZONE_CHANGED:當時區被改變時通知 |
| 11 | ACTION_UNINSTALL_PACKAGE:運行默認的卸載器 |
類別
類別是意圖中可選的部分,是一個字符串,包含該類型組件需要處理的意圖的附加信息。 addCategory() 方法為意圖對象添加類別,removeCategory() 方法刪除之前添加的類別,getCategories() 獲取所有被設置到意圖對像中的類別。 這裡是Android意圖標準類別列表。
可以查看下面章節中的意圖過濾器來了解我們如何使用類別來通過對應的意圖選擇合適的活動。
附加數據
這是傳遞給需要處理意圖的組件的以鍵值對描述的附加信息。 通過putExtras() 方法設置,getExtras() 方法讀取。 這裡是Android意圖標準附加數據列表。
標記
這些標記是意圖的可選部分,說明Android系統如何來啟動活動,啟動後如何處理等。
| 序號 | 標記和說明 |
|---|---|
| 1 | FLAG_ACTIVITY_CLEAR_TASK :如果在意圖中設置,並通過Context.startActivity 傳遞,這個標記將導致與該活動相關聯的所有已存在的任務在活動啟動前被清空。 活動將成為一個空任務的根,所有舊的活動被結束。 該標記可以與FLAG_ACTIVITY_NEW_TASK 結合使用。 |
| 2 | FLAG_ACTIVITY_CLEAR_TOP :如果設置該標記,活動將在當前運行的任務中被啟動。 這病不會啟動一個新的活動實例,所有的在它之上的活動被關閉,這個意圖作為一個新的意圖被傳遞到已有的(目前在頂部的)活動。 |
| 3 | FLAG_ACTIVITY_NEW_TASK :這個標記一般用於使得活動用於"啟動器"風格的行為:為用戶提供一個可以獨立完成運行的數據,並啟動完整兒獨立的活動。 |
組件名稱
組件名稱對像是一個可選的域,代表活動、服務或者廣播接收器類。 如果設置,則意圖對像被傳遞到實現設計好的類的實例,否則,Android 使用其他意圖中的其他信息來定位一個合適的目標。 組件名稱通過setComponent(),setClass()或者setClassName() 來設置,通過getComponent() 獲取。
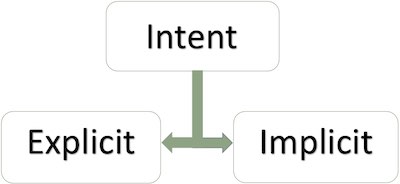
意圖的類型
Android 支持兩種類型的意圖。
顯式意圖
顯式意圖用於連接應用程序的內部世界,假設你需要連接一個活動到另外一個活動,我們可以通過顯示意圖,下圖顯示通過點擊按鈕連接第一個活動到第二個活動。
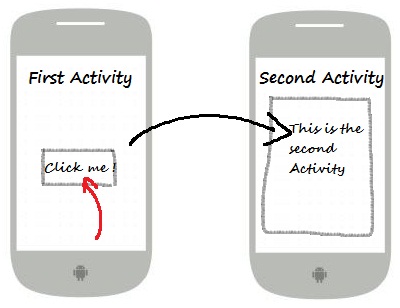
這些意圖通過名稱指定目標組件,一般用於應用程序內部信息- 比如一個活動啟動一個下屬活動或者啟動一個兄弟活動。 舉個例子:
// 通过指定类名的显式意图
Intent i = new Intent(FirstActivity.this, SecondAcitivity.class);

// 启动目标活动
startActivity(i);
隱式意圖
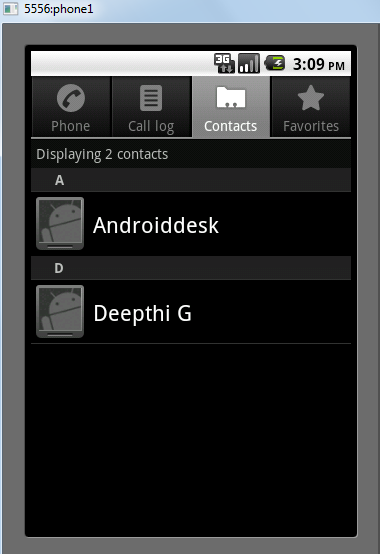
這些意圖沒有為目標命名,組件名稱的域為空。 隱式意圖經常用於激活其他應用程序的組件。 舉個例子:
Intent read1=new Intent();
read1.setAction(android.content.Intent.ACTION_VIEW);
read1.setData(ContactsContract.Contacts.CONTENT_URI);
startActivity(read1);
上面的代碼將給出如下結果:
目標組件接收到意圖,可以使用getExtras()方法來獲取由源組件發送的附加數據。 例如:
// 在代码中的合适位置获取包对象
Bundle extras = getIntent().getExtras();

// 通过键解压数据
String value1 = extras.getString("Key1");
String value2 = extras.getString("Key2");
實例
下面的實例演示使用Android 意圖來啟動各種Android 內置應用程序的功能。
| 步驟 | 描述 |
|---|---|
| 1 | 使用Android Studio IDE 創建Android 應用程序,並命名為Intent filter,包名為cn.uprogrammer.intentfilter。 當創建項目時,確保目標SDK 和用最新版本的Android SDK 進行編譯使用高級的API。 |
| 2 | 修改src/cn.uprogrammer.intentfilter/MainActivity.java文件,並添加代碼定義兩個監聽器來對應兩個按鈕"啟動瀏覽器"和"啟動電話" |
| 3 | 修改res/layout/activity_main.xml佈局文件,在線性佈局中添加3個按鈕。 |
| 4 | 啟動Android模擬器來運行應用程序,並驗證應用程序所做改變的結果。 |
以下是src/cn.uprogrammer.intentfilter/MainActivity.java文件的內容:
package cn.uprogrammer.intentfilter;

import android.content.Intent;
import android.net.Uri;
import android.support.v7.app.ActionBarActivity;
import android.os.Bundle;
import android.view.Menu;
import android.view.MenuItem;
import android.view.View;
import android.widget.Button;


public class MainActivity extends ActionBarActivity {
    Button b1,b2;

    @Override
    protected void onCreate(Bundle savedInstanceState) {
        super.onCreate(savedInstanceState);
        setContentView(R.layout.activity_main);

        b1=(Button)findViewById(R.id.button);
        b1.setOnClickListener(new View.OnClickListener() {

            @Override
            public void onClick(View v) {
                Intent i = new Intent(android.content.Intent.ACTION_VIEW, Uri.parse("http://www.uprogrammer.cn"));
                startActivity(i);
            }
        });

        b2=(Button)findViewById(R.id.button2);
        b2.setOnClickListener(new View.OnClickListener() {
            @Override
            public void onClick(View v) {
                Intent i = new Intent(android.content.Intent.ACTION_VIEW,Uri.parse("tel:9510300000"));
                startActivity(i);
            }
        });
    }

    @Override
    public boolean onCreateOptionsMenu(Menu menu) {
        getMenuInflater().inflate(R.menu.menu_main, menu);
        return true;
    }

    @Override
    public boolean onOptionsItemSelected(MenuItem item) {
        // Handle action bar item clicks here. The action bar will
        // automatically handle clicks on the Home/Up button, so long
        // as you specify a parent activity in AndroidManifest.xml.

        int id = item.getItemId();

        //noinspection SimplifiableIfStatement
        if (id == R.id.action_settings) {
            return true;
        }
        return super.onOptionsItemSelected(item);
    }
}
下面是res/layout/activity_main.xml文件的內容:
<RelativeLayout xmlns:android="http://schemas.android.com/apk/res/android"
    xmlns:tools="http://schemas.android.com/tools"
    android:layout_width="match_parent"
    android:layout_height="match_parent"
    android:paddingLeft="@dimen/activity_horizontal_margin"
    android:paddingRight="@dimen/activity_horizontal_margin"
    android:paddingTop="@dimen/activity_vertical_margin"
    android:paddingBottom="@dimen/activity_vertical_margin"
    tools:context=".MainActivity">

    <TextView
        android:id="@+id/textView1"
        android:layout_width="wrap_content"
        android:layout_height="wrap_content"
        android:text="意图实例"
        android:layout_alignParentTop="true"
        android:layout_centerHorizontal="true"
        android:textSize="30dp" />

    <TextView
        android:id="@+id/textView2"
        android:layout_width="wrap_content"
        android:layout_height="wrap_content"
        android:text="www.uprogrammer.cn"
        android:textColor="#ff87ff09"
        android:textSize="30dp"
        android:layout_below="@+id/textView1"
        android:layout_centerHorizontal="true" />

    <ImageButton
        android:layout_width="wrap_content"
        android:layout_height="wrap_content"
        android:id="@+id/imageButton"
        android:src="@drawable/ic_launcher"
        android:layout_below="@+id/textView2"
        android:layout_centerHorizontal="true" />

    <EditText
        android:layout_width="wrap_content"
        android:layout_height="wrap_content"
        android:id="@+id/editText"
        android:layout_below="@+id/imageButton"
        android:layout_alignRight="@+id/imageButton"
        android:layout_alignEnd="@+id/imageButton" />

    <Button
        android:layout_width="wrap_content"
        android:layout_height="wrap_content"
        android:text="启动浏览器"
        android:id="@+id/button"
        android:layout_alignTop="@+id/editText"
        android:layout_alignRight="@+id/textView1"
        android:layout_alignEnd="@+id/textView1"
        android:layout_alignLeft="@+id/imageButton"
        android:layout_alignStart="@+id/imageButton" />

    <Button
        android:layout_width="wrap_content"
        android:layout_height="wrap_content"
        android:text="启动电话"
        android:id="@+id/button2"
        android:layout_below="@+id/button"
        android:layout_alignLeft="@+id/button"
        android:layout_alignStart="@+id/button"
        android:layout_alignRight="@+id/textView2"
        android:layout_alignEnd="@+id/textView2" />
</RelativeLayout>
下面是res/values/strings/xml的內容,定義了兩個新的常量。
<?xml version="1.0" encoding="utf-8"?>
<resources>
   <string name="app_name">Intent filter</string>
   <string name="action_settings">Settings</string>
</resources>
下面是默認的AndroidManifest.xml的內容:
<?xml version="1.0" encoding="utf-8"?>
<manifest xmlns:android="http://schemas.android.com/apk/res/android"
package="cn.uprogrammer.intentfilter"
android:versionCode="1"
android:versionName="1.0" >
<uses-sdk
android:minSdkVersion="8"
android:targetSdkVersion="22" />
<application
android:allowBackup="true"
android:icon="@drawable/ic_launcher"
android:label="@string/app_name"
android:theme="@style/Base.Theme.AppCompat" >
<activity
android:name="cn.uprogrammer.intentfilter.MainActivity"
android:label="@string/app_name" >
<intent-filter>
<action android:name="android.intent.action.MAIN" />
<category android:name="android.intent.category.LAUNCHER" />
</intent-filter>
</activity>
</application>
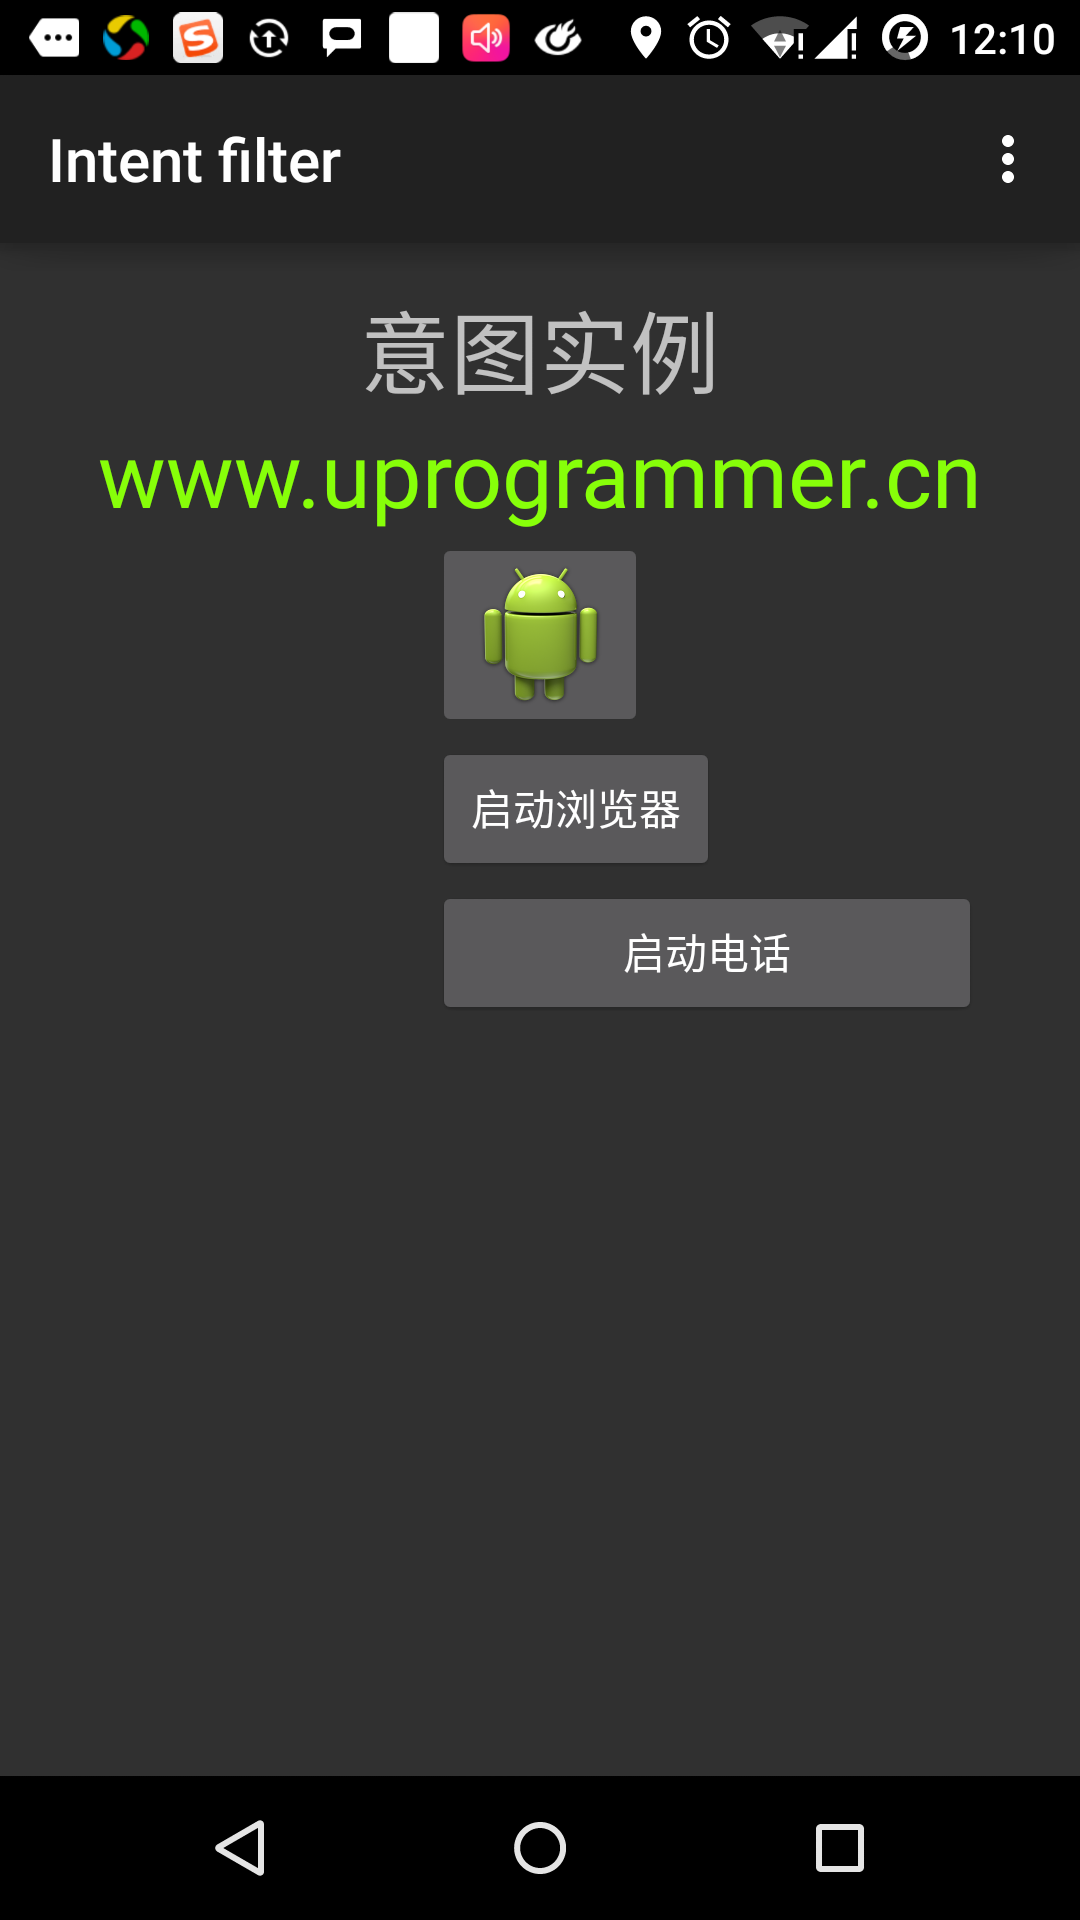
</manifest> 讓我們運行剛剛修改的Intent filter 應用程序。 我假設你已經在安裝環境時創建了AVD。 打開你的項目中的活動文件,點擊工具欄中的  圖標來在Android Studio 中運行應用程序。 Android Studio 在AVD 上安裝應用程序並啟動它。 如果一切順利,將在模擬器窗口上顯示如下:
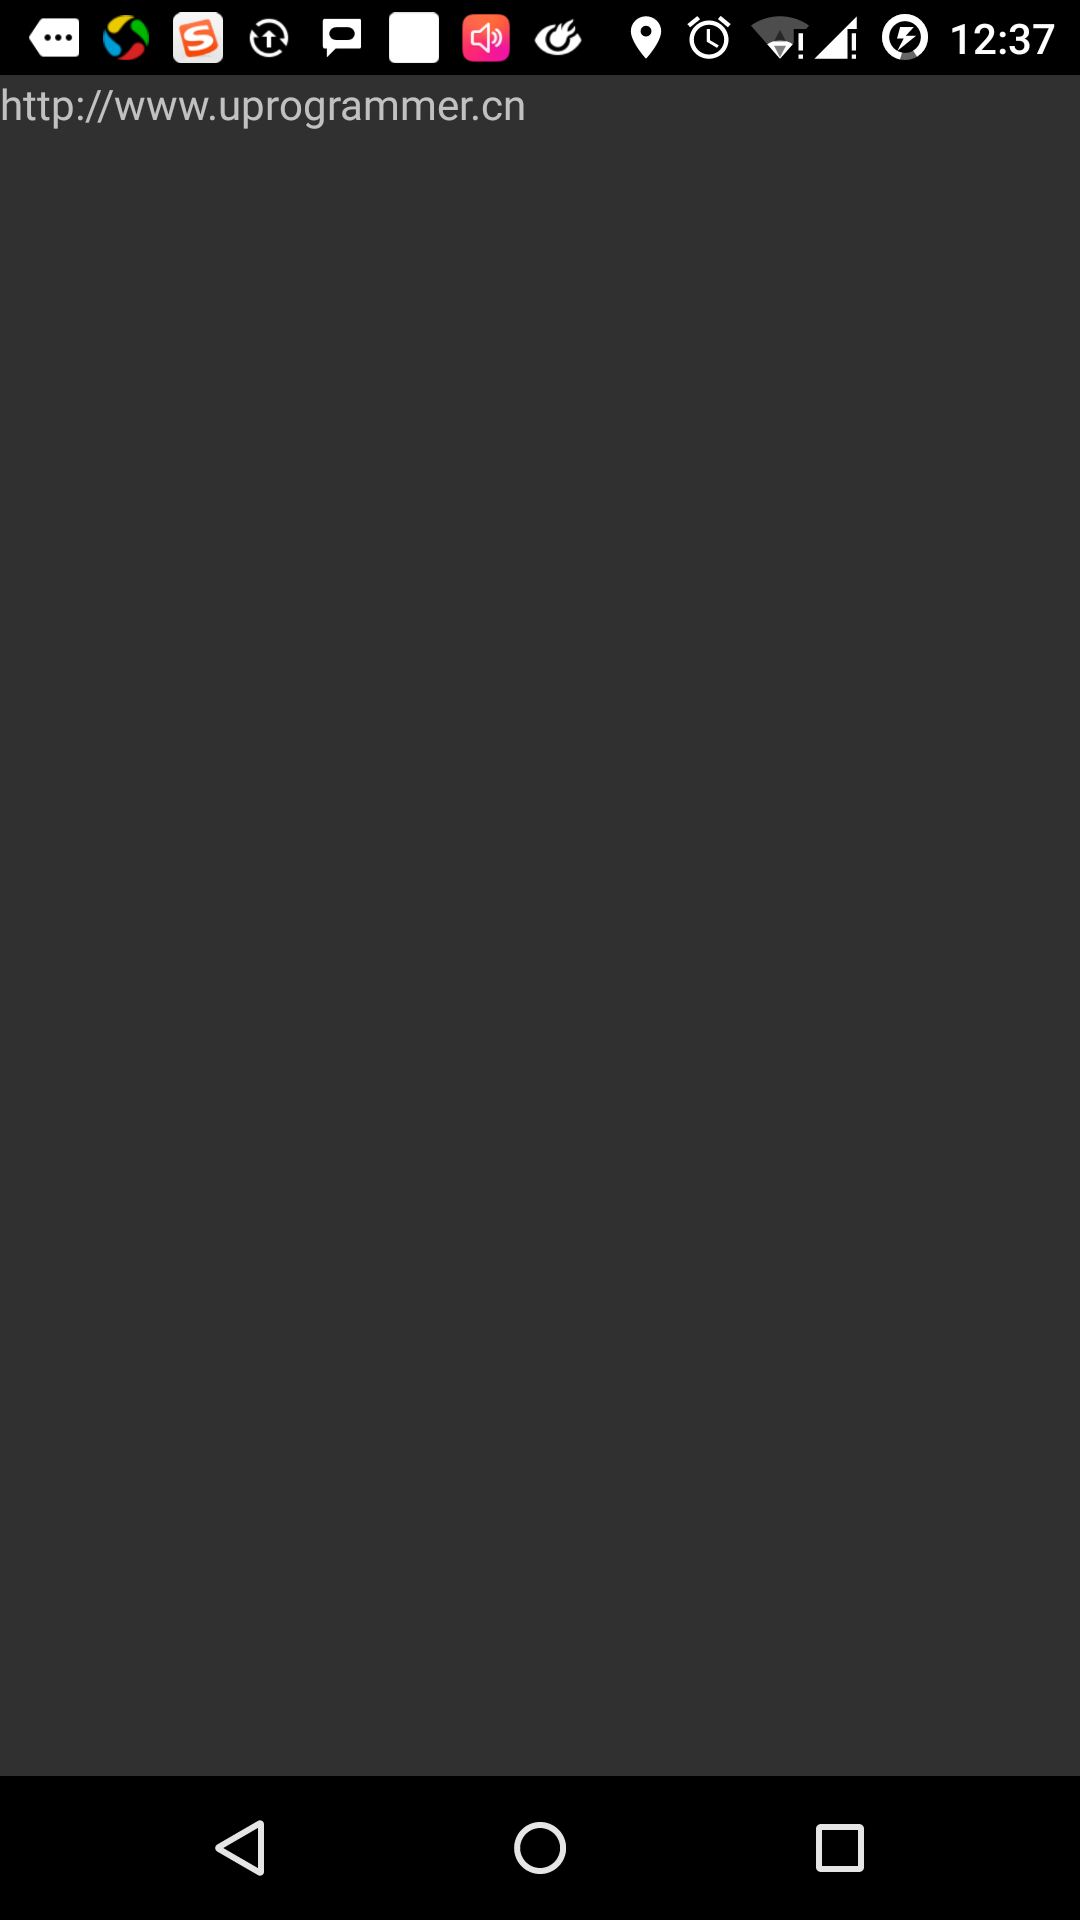
現在點擊"啟動瀏覽器"按鈕,這將根據配置啟動一個瀏覽器,並且顯示http://www.uprogrammer.cn如下:
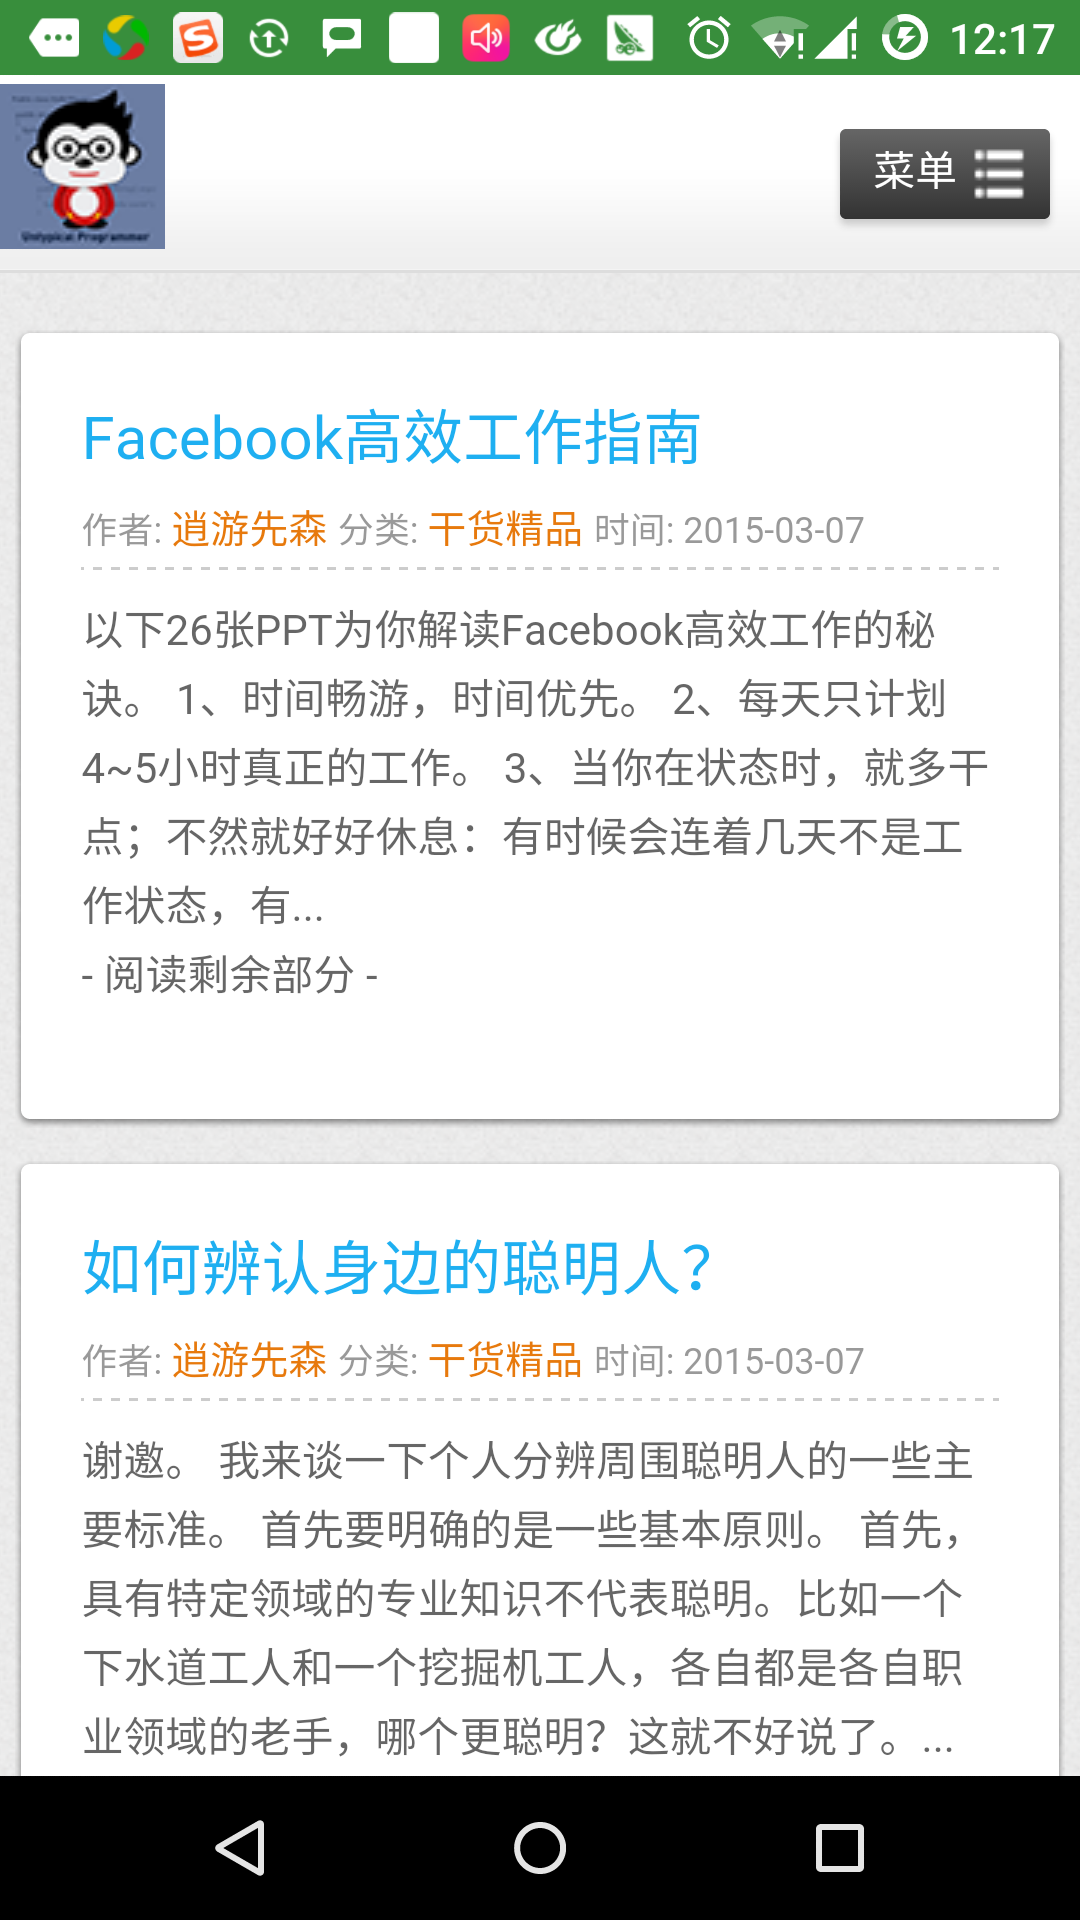
類似的方式,你可以點擊"啟動電話"按鈕來打開電話界面,這將允許你撥打已經給定的電話號碼。
意圖過濾器
你已經看到如何使用意圖來調用另外的活動。 Android 操作系統使用過濾器來指定一系列活動、服務和廣播接收器處理意圖,需要藉助於意圖所指定的動作、類別、數據模式。 在manifest 文件中使用<intent-filter> 元素在活動,服務和廣播接收器中列出對應的動作,類別和數據類型。
下面的實例展示AndroidManifest.xml文件的一部分,指定一個活動cn.uprogrammer.intentfilter.CustomActivity可以通過設置的動作,類別及數據來調用:
<activity android:name=".CustomActivity"
   android:label="@string/app_name">

   <intent-filter>
      <action android:name="android.intent.action.VIEW" />
      <action android:name="com.example.MyApplication.LAUNCH" />
      <category android:name="android.intent.category.DEFAULT" />
      <data android:scheme="http" />
   </intent-filter>

</activity>
當活動被上面的過濾器所定義,其他活動就可以通過下面的方式來調用這個活動。 使用android.intent.action.VIEW,使用cn.uprogrammer.intentfilter.LAUNCH 動作,並提供android.intent.category.DEFAULT類別。
元素指定要被調用的活動所期望的數據類型。 上面的實例中,自定義活動期望的數據由"http://"開頭。
有這樣的情況,通過過濾器,意圖將被傳遞到多個的活動或者服務,用戶將被詢問啟動哪個組件。 如果沒有找到目標組件,將發生一個異常。
在調用活動之前,有一系列的Android 檢查測試:
- 過濾器<intent-filter> 需要列出一個或者多個的動作,不能為空;過濾器至少包含一個
元素,否則將阻塞所有的意圖。 如果多個動作被提到,Android 在調用活動前嘗試匹配其中提到的一個動作。 - 過濾器<intent-filter> 可能列出0個,1個或者多個類別。 如果沒有類別被提到,Android 通過這個測試,如果有多個類別被提及,意圖通過類型測試,每個意圖對象的分類必須匹配過濾器中的一個分類。
- 每個 元素可以指定一個URI 和一個數據類型(元媒體類型)。 這裡有獨立的屬性,如URI 中的每個部分:模式,主機,端口和路徑。 意圖包含有URI 和類型,只有它的類型匹配了過濾器中列出的某個類型,則通過數據類型部分的測試。
實例
下面的實例是上面實例的一些修改。 這裡我們將看到如果一個意圖調用定義的兩個活動,Android 如何來解決衝突;如何使用過濾器來調用自定義活動;如果沒有為意圖定義合適的活動,則會出現異常。
| 步驟 | 說明 |
|---|---|
| 1 | 使用Android Studio IDE創建Android應用程序,並命名為Intent filter,包名為cn.uprogrammer.intentfilter。 當創建項目時,確保目標SDK 和用最新版本的Android SDK 進行編譯使用高級的API。 |
| 2 | 修改src/cn.uprogrammer.intentfilter/MainActivity.java 文件,添加代碼來定義三個監聽器來對應佈局文件中定義的三個按鈕。 |
| 3 | 添加src/cn.uprogrammer.intentfilter/CustomActivity.java 文件來包含一個活動,可以被不同的意圖調用。 |
| 4 | 修改res/layout/activity_main.xml 文件在線性佈局中添加三個按鈕。 |
| 5 | 添加res/lauout/custom_view.xml 佈局文件,添加簡單地 |
| 6 | 修改AndroidManifest.xml 文件,添加<intent-filter> 定義意圖的規則來調用自定義活動。 |
| 7 | 啟動Android 模擬器來運行應用程序,並驗證應用程序所做改變的結果。 |
以下是src/cn.uprogrammer.intentfilter/MainActivity.java的內容:
package cn.uprogrammer.intentfilter;

import android.content.Intent;
import android.net.Uri;
import android.support.v7.app.ActionBarActivity;
import android.os.Bundle;
import android.view.Menu;
import android.view.MenuItem;
import android.view.View;
import android.widget.Button;


public class MainActivity extends ActionBarActivity {
    Button b1,b2,b3;

    @Override
    protected void onCreate(Bundle savedInstanceState) {
        super.onCreate(savedInstanceState);
        setContentView(R.layout.activity_main);
        b1=(Button)findViewById(R.id.button);

        b1.setOnClickListener(new View.OnClickListener() {

            @Override
            public void onClick(View v) {
                Intent i = new Intent(android.content.Intent.ACTION_VIEW,Uri.parse("http://www.uprogrammer.cn"));
                startActivity(i);
            }
        });

        b2=(Button)findViewById(R.id.button2);
        b2.setOnClickListener(new View.OnClickListener() {

            @Override
            public void onClick(View v) {
                Intent i = new Intent("cn.uprogrammer.intentfilter.LAUNCH",Uri.parse("http://www.uprogrammer.cn"));
                startActivity(i);
            }
        });

        b3=(Button)findViewById(R.id.button3);
        b3.setOnClickListener(new View.OnClickListener() {

            @Override
            public void onClick(View v) {
                Intent i = new Intent("cn.uprogrammer.intentfilter.LAUNCH",Uri.parse("https://www.uprogrammer.cn"));
                startActivity(i);
            }
        });
    }

    @Override
    public boolean onCreateOptionsMenu(Menu menu) {
        // Inflate the menu; this adds items to the action bar if it is present.
        getMenuInflater().inflate(R.menu.menu_main, menu);
        return true;
    }

    @Override
    public boolean onOptionsItemSelected(MenuItem item) {
        // Handle action bar item clicks here. The action bar will
        // automatically handle clicks on the Home/Up button, so long
        // as you specify a parent activity in AndroidManifest.xml.

        int id = item.getItemId();

        //noinspection SimplifiableIfStatement
        if (id == R.id.action_settings) {
            return true;
        }
        return super.onOptionsItemSelected(item);
    }
}
下面是src/cn.uprogrammer.intentfilter/CustomActivity.java的內容:
package cn.uprogrammer.intentfilter;

import android.app.Activity;
        import android.net.Uri;
        import android.os.Bundle;
        import android.widget.TextView;

public class CustomActivity extends Activity {
    @Override
    public void onCreate(Bundle savedInstanceState) {
        super.onCreate(savedInstanceState);
        setContentView(R.layout.custom_view);
        TextView label = (TextView) findViewById(R.id.show_data);
        Uri url = getIntent().getData();
        label.setText(url.toString());
    }
}
下面是res/layout/activity_main.xml 的內容:
<RelativeLayout xmlns:android="http://schemas.android.com/apk/res/android"
    xmlns:tools="http://schemas.android.com/tools"
    android:layout_width="match_parent"
    android:layout_height="match_parent"
    android:paddingLeft="@dimen/activity_horizontal_margin"
    android:paddingRight="@dimen/activity_horizontal_margin"
    android:paddingTop="@dimen/activity_vertical_margin"
    android:paddingBottom="@dimen/activity_vertical_margin"
    tools:context=".MainActivity">

    <TextView
        android:id="@+id/textView1"
        android:layout_width="wrap_content"
        android:layout_height="wrap_content"
        android:text="意图实例"
        android:layout_alignParentTop="true"
        android:layout_centerHorizontal="true"
        android:textSize="30dp" />

    <TextView
        android:id="@+id/textView2"
        android:layout_width="wrap_content"
        android:layout_height="wrap_content"
        android:text="www.uprogrammer.cn"
        android:textColor="#ff87ff09"
        android:textSize="30dp"
        android:layout_below="@+id/textView1"
        android:layout_centerHorizontal="true" />

    <ImageButton
        android:layout_width="wrap_content"
        android:layout_height="wrap_content"
        android:id="@+id/imageButton"
        android:src="@drawable/ic_launcher"
        android:layout_below="@+id/textView2"
        android:layout_centerHorizontal="true" />

    <EditText
        android:layout_width="wrap_content"
        android:layout_height="wrap_content"
        android:id="@+id/editText"
        android:layout_below="@+id/imageButton"
        android:layout_alignRight="@+id/imageButton"
        android:layout_alignEnd="@+id/imageButton" />

    <Button
        android:layout_width="wrap_content"
        android:layout_height="wrap_content"
        android:text="通过View动作启动浏览器"
        android:id="@+id/button"
        android:layout_alignTop="@+id/editText"
        android:layout_alignRight="@+id/textView1"
        android:layout_alignEnd="@+id/textView1"
        android:layout_alignLeft="@+id/imageButton"
        android:layout_alignStart="@+id/imageButton" />

    <Button
        android:layout_width="wrap_content"
        android:layout_height="wrap_content"
        android:text="通过Launch动作启动浏览器"
        android:id="@+id/button2"
        android:layout_below="@+id/button"
        android:layout_alignLeft="@+id/button"
        android:layout_alignStart="@+id/button"
        android:layout_alignRight="@+id/textView2"
        android:layout_alignEnd="@+id/textView2" />

    <Button
        android:layout_width="wrap_content"
        android:layout_height="wrap_content"
        android:text="异常情况"
        android:id="@+id/button3"
        android:layout_below="@+id/button2"
        android:layout_alignLeft="@+id/button2"
        android:layout_alignStart="@+id/button2"
        android:layout_alignRight="@+id/textView2"
        android:layout_alignEnd="@+id/textView2" />

</RelativeLayout>
下面是res/layout/custom_view.xml文件的內容:
<?xml version="1.0" encoding="utf-8"?>
<LinearLayout xmlns:android="http://schemas.android.com/apk/res/android"
   android:orientation="vertical"
   android:layout_width="fill_parent"
   android:layout_height="fill_parent">

   <TextView android:id="@+id/show_data"
      android:layout_width="fill_parent"
      android:layout_height="400dp"/>

</LinearLayout>
下面是res/values/strings.xml文件的內容:
<?xml version="1.0" encoding="utf-8"?>
<resources>
   <string name="app_name">My Application</string>
   <string name="action_settings">Settings</string>
</resources>
下面是AndroidManifest.xml文件的內容:
<?xml version="1.0" encoding="utf-8"?>
<manifest xmlns:android="http://schemas.android.com/apk/res/android"
package="cn.uprogrammer.intentfilter"
android:versionCode="1"
android:versionName="1.0" >
<uses-sdk
android:minSdkVersion="8"
android:targetSdkVersion="22" />
<application
android:allowBackup="true"
android:icon="@drawable/ic_launcher"
android:label="@string/app_name"
android:theme="@style/Base.Theme.AppCompat" >
<activity
android:name="cn.uprogrammer.intentfilter.MainActivity"
android:label="@string/app_name" >
<intent-filter>
<action android:name="android.intent.action.MAIN" />
<category android:name="android.intent.category.LAUNCHER" />
</intent-filter>
</activity>
<activity android:name="cn.uprogrammer.intentfilter.CustomActivity"
android:label="@string/app_name">
<intent-filter>
<action android:name="android.intent.action.VIEW" />
<action android:name="cn.uprogrammer.intentfilter.LAUNCH" />
<category android:name="android.intent.category.DEFAULT" />
<data android:scheme="http" />
</intent-filter>
</activity>
</application>
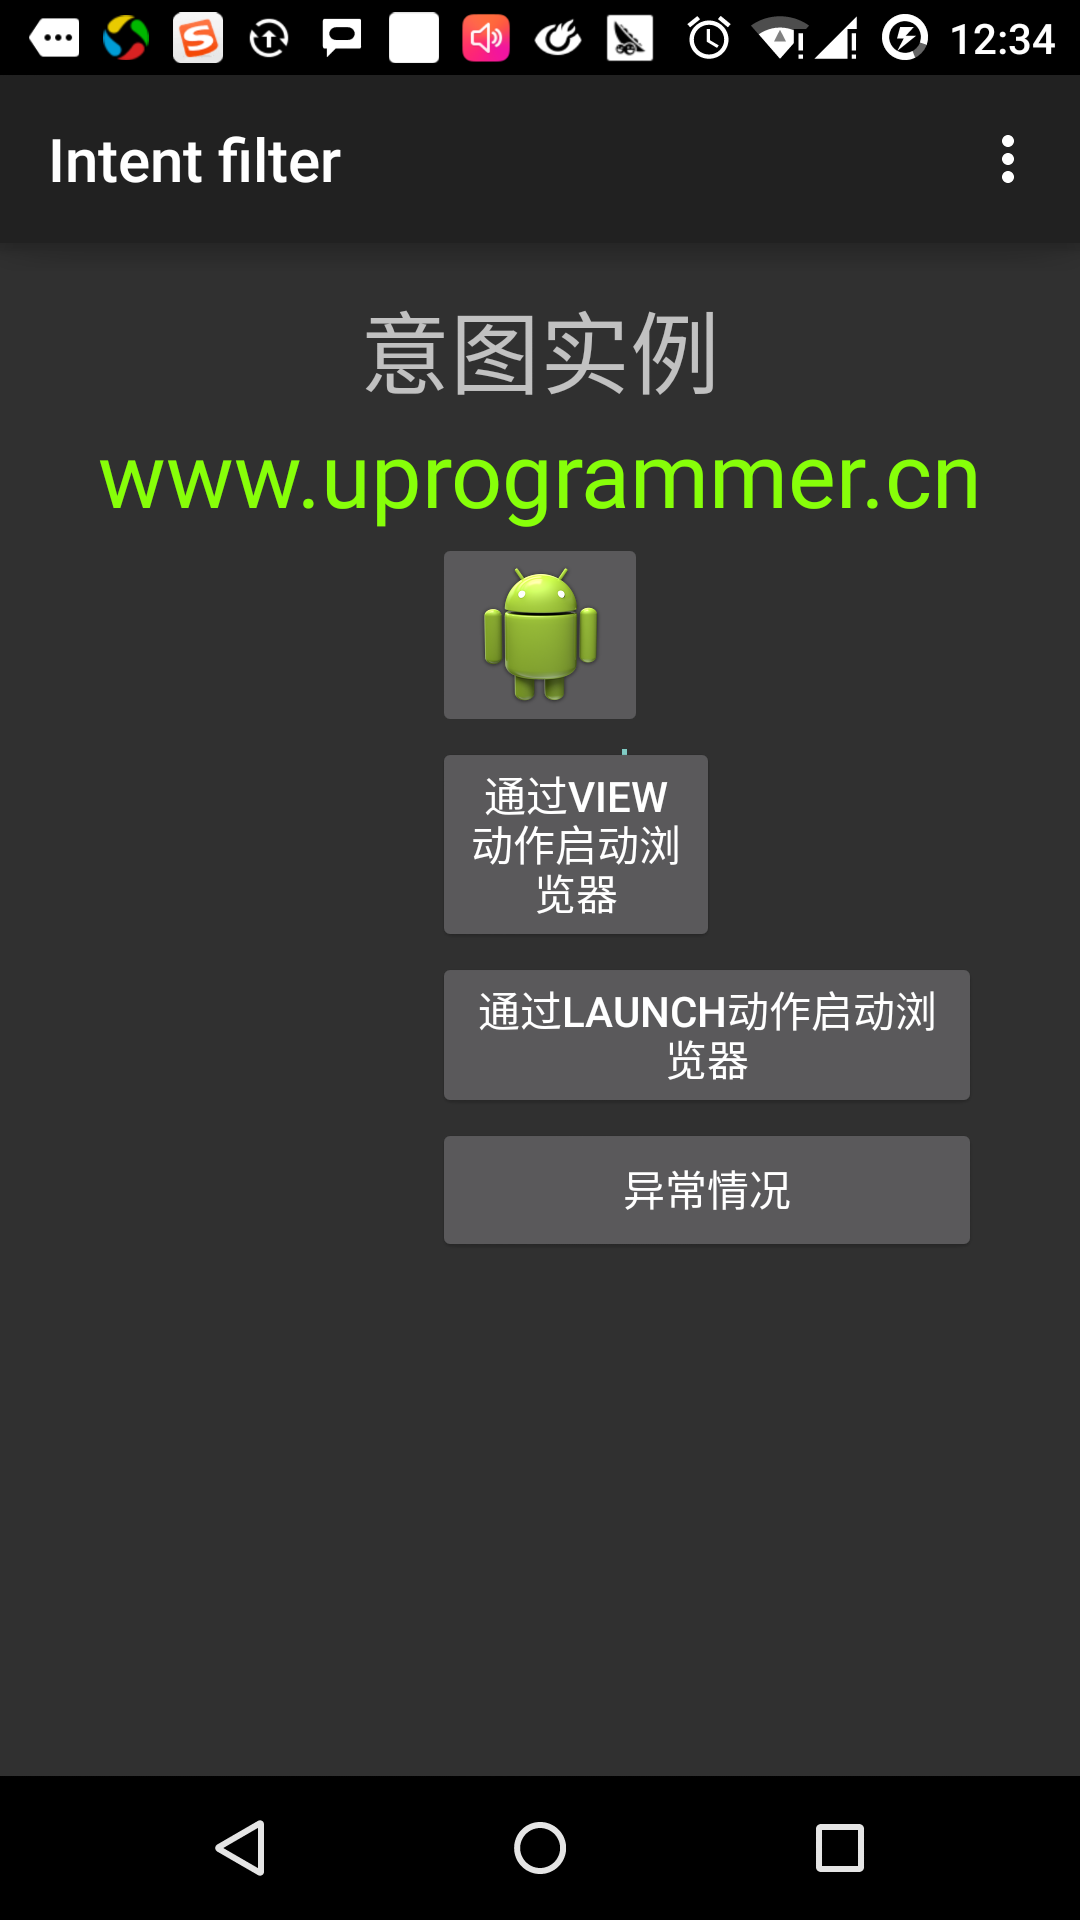
</manifest> 讓我們運行剛剛修改的Intent filter 應用程序。 我假設你已經在安裝環境時創建了AVD 。 打開你的項目中的活動文件,點擊工具欄中的 圖標來在Android Studio 中運行應用程序。 Android Studio 在AVD 上安裝應用程序並啟動它。 如果一切順利,將在模擬器窗口上顯示如下:
點擊第一個按鈕"使用View動作啟動瀏覽器"。 這裡我們定義我們自定義的活動包含"android.intent.action.VIEW",並且Android 系統已經定義了默認的活動來對應VIEW動作來啟動Web瀏覽器,因此Android 顯示下面的選項來選擇你想要啟動的活動:
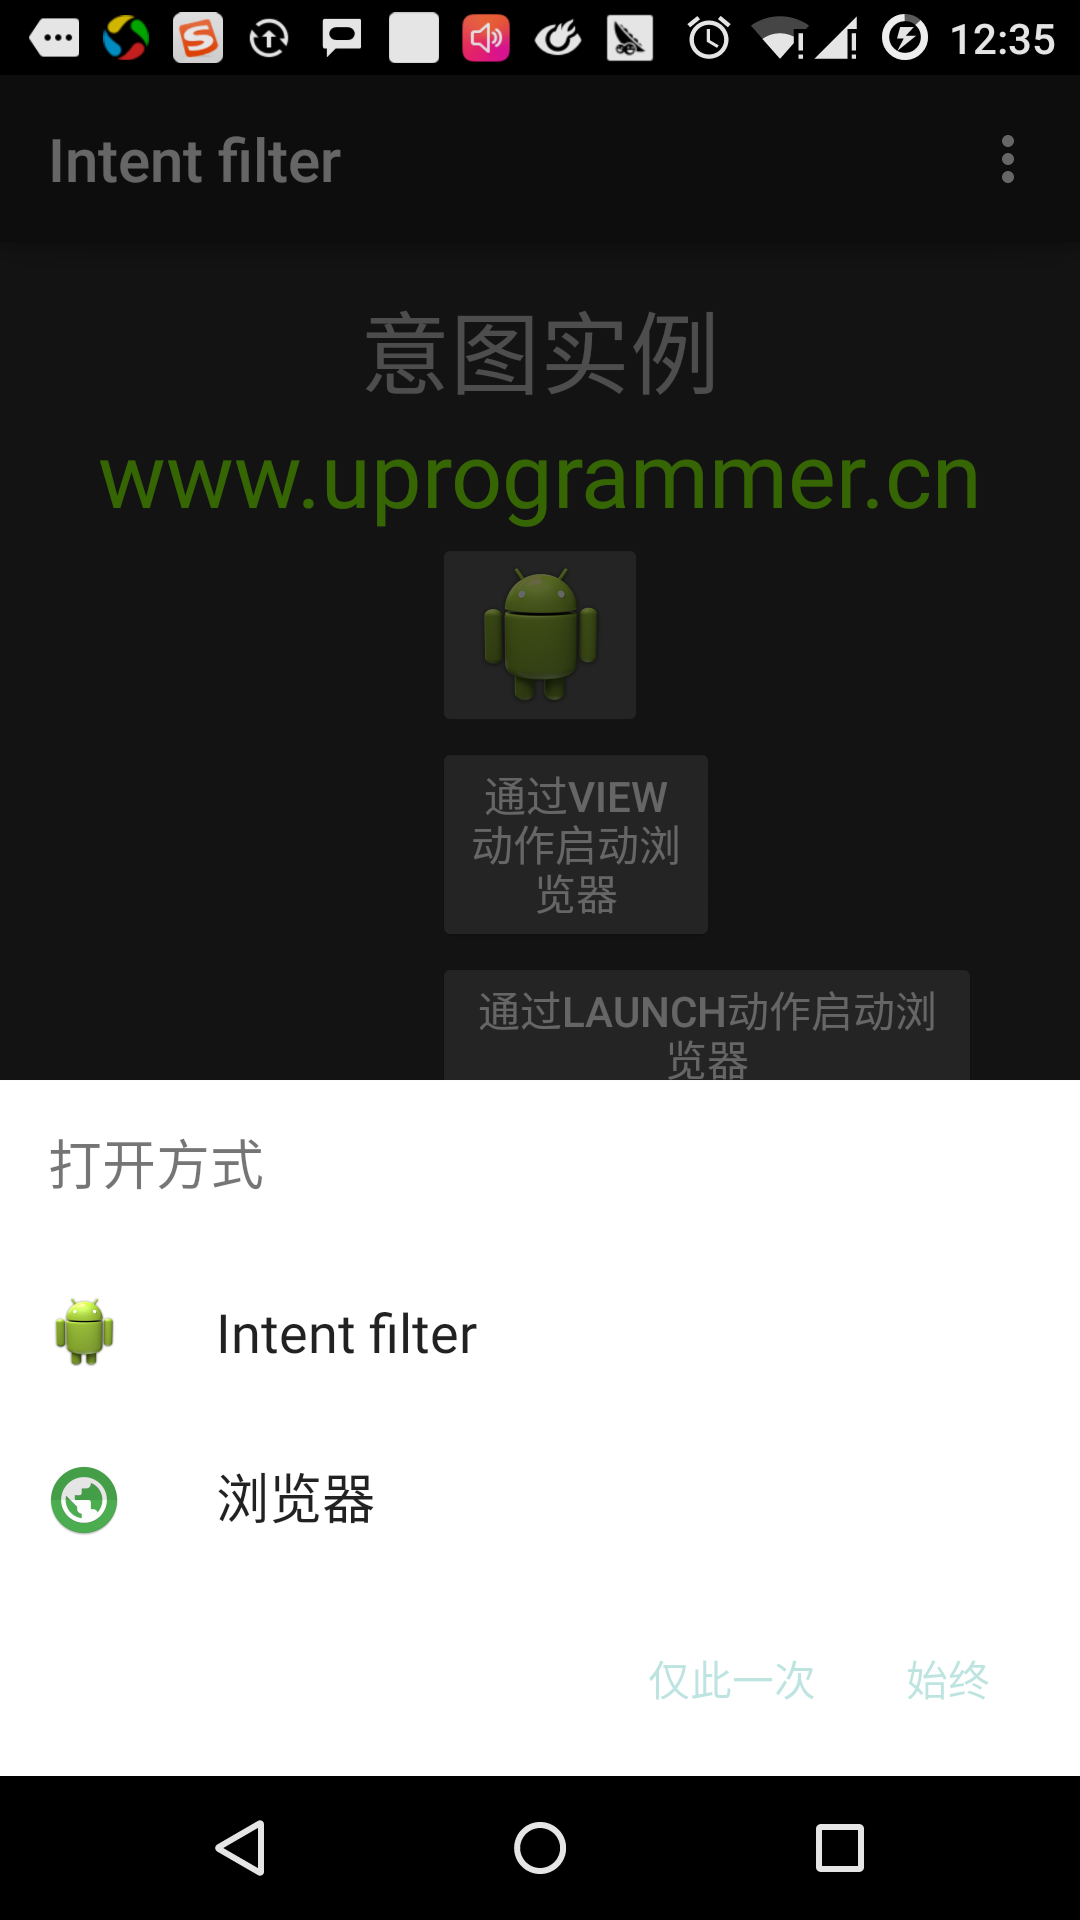
如果你選擇瀏覽器, Android 將啟動Web 瀏覽器,並打開www.uprogrammer.cn 網站。 如果你選擇IntentDemo選項,Android 將啟動CustomActivity,該活動什麼都沒有做,僅僅是捕獲並在TextView中顯示傳遞的數據。
現在,通過返回按鈕返回並點擊"通過Launch動作啟動瀏覽器"按鈕,這裡Android 應用過濾器來選擇定義的活動,並簡單啟動自定義活動。
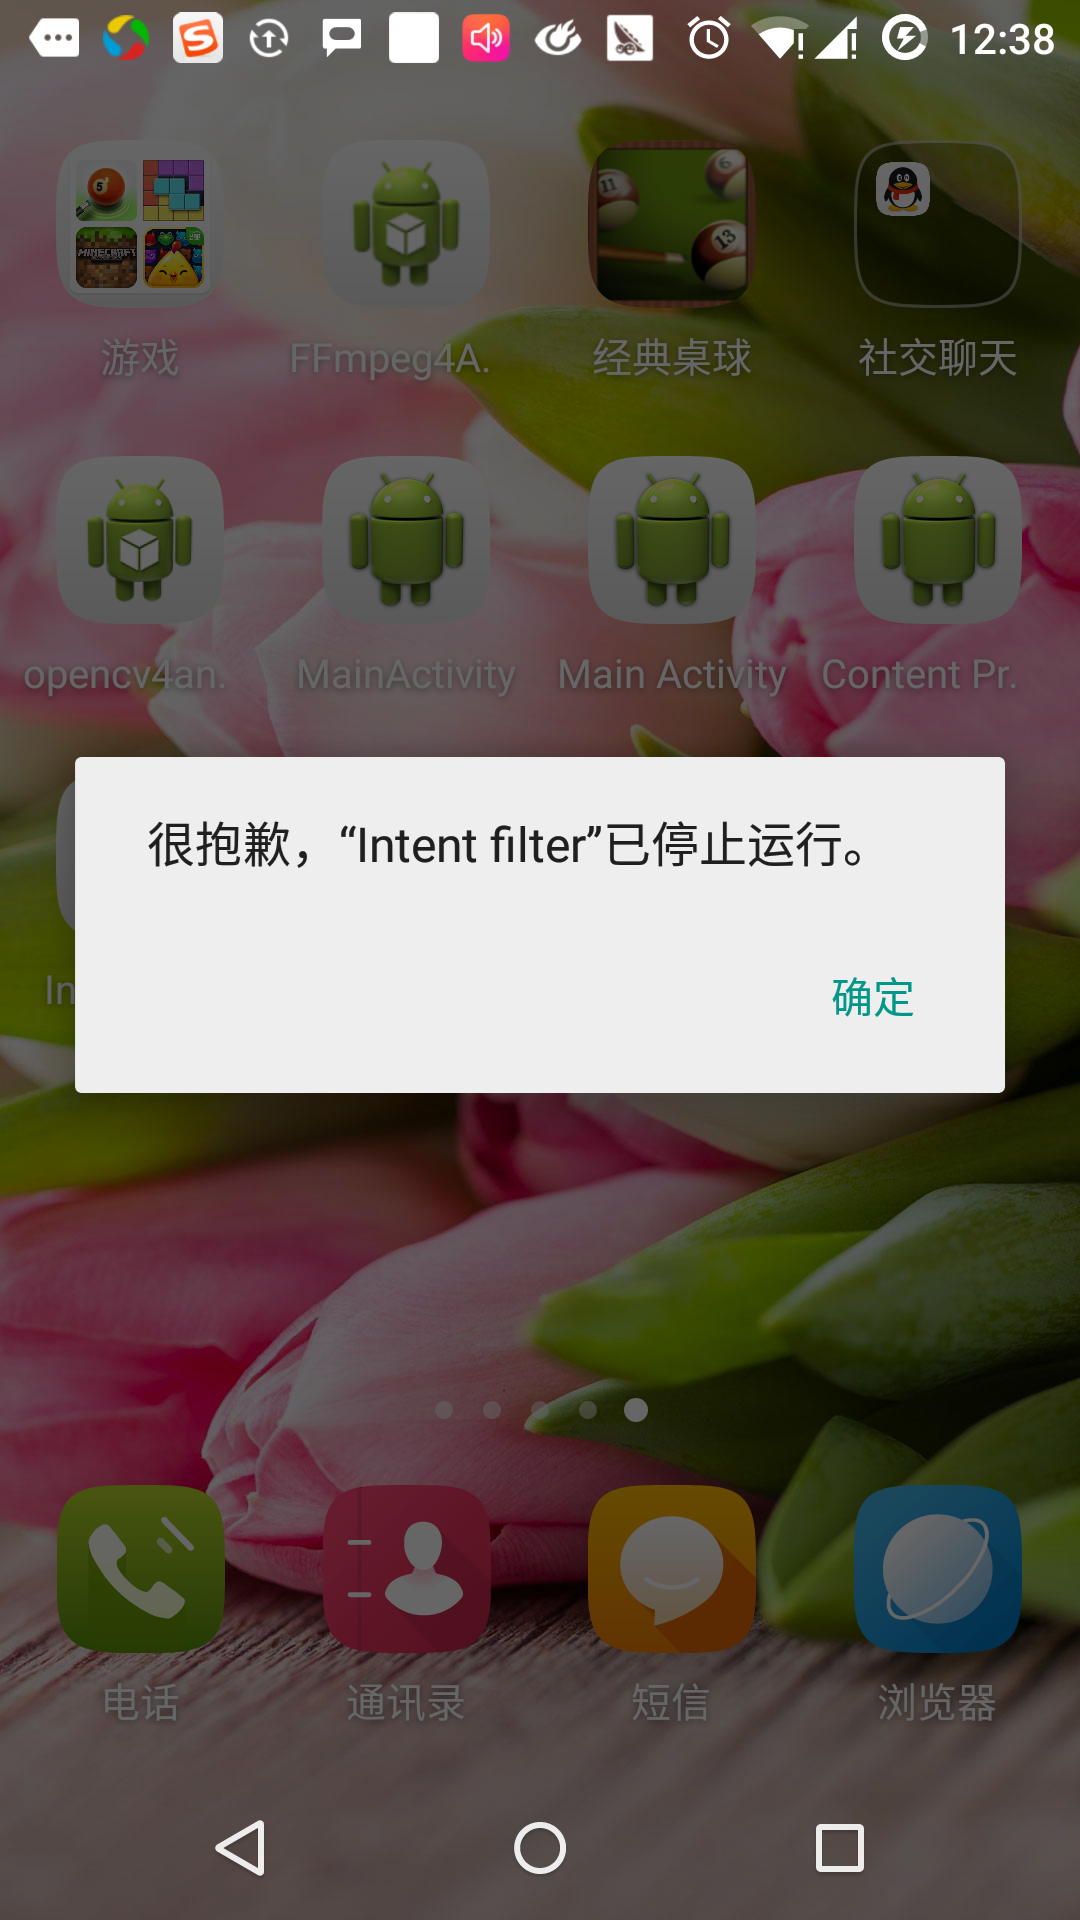
再次使用返回按鈕返回,並點擊"異常條件"按鈕,這裡Android嘗試找到一個由意圖給定的有效的過濾器,但沒有找到一個定義的有效的活動。 因為我們使用https 代替http 的數據,並給定了正確的動作,一次Android 產生了一個異常。 如下: