การกระจายตัวของ Android กรอบเดียว
เศษกรอบเดียว: ชิ้นส่วนของกรอบเดียวถูกออกแบบมาสำหรับอุปกรณ์หน้าจอขนาดเล็กเช่นอุปกรณ์มือถือ (โทรศัพท์มือถือ) Android 3.0 หรือสูงกว่าการสนับสนุน
ตัวอย่าง
ตัวอย่างนี้อธิบายถึงวิธีการสร้างชิ้นของคุณเอง ที่นี่เราสร้างสองชิ้นหนึ่งซึ่งถูกนำมาใช้ในอุปกรณ์ที่มีการข้ามหน้าจอเมื่ออุปกรณ์ที่จะใช้ในเวลาหน้าจออื่นในแนวตั้ง ลองทำตามขั้นตอนเริ่มต้น
| ขั้นตอน | ลักษณะ |
|---|---|
| 1 | โดยใช้ Android Studio IDE ในการสร้างโปรแกรม Android ชื่อเดี่ยวเศษ cn.uprogrammer.singlefragments ชื่อแพคเกจ |
| 2 | แก้ไขไฟล์ที่ใช้งานหลักที่แสดงด้านล่าง MainActivity.java นี่เรากำลังจะไปตรวจสอบการวางแนวของอุปกรณ์และอยู่บนพื้นฐานนี้เพื่อสลับระหว่างชิ้นที่แตกต่างกัน |
| 3 | สร้าง PortraitFragment.java และ LandscapeFragment.java สองไฟล์ในแพคเกจ cn.uprogrammer.singlefragments และวิธีการที่เกี่ยวข้อง |
| 4 | สร้างไฟล์รูปแบบความละเอียด / รูปแบบ / landscape_fragment.xml และ Res / รูปแบบ / portrait_fragment.xml ในการกำหนดรูปแบบของทั้งสองชิ้นส่วน |
| 5 | ปรับเปลี่ยนความละเอียด / รูปแบบ / activity_main.xml จะมีสองชิ้น |
| 6 | กำหนดความต้องการอย่างต่อเนื่องในความละเอียด / ค่า / strings.xml ใน |
| 7 | เปิดตัวโปรแกรมจำลอง Android เพื่อเรียกใช้โปรแกรมประยุกต์และตรวจสอบผลของการเปลี่ยนแปลงที่เกิดขึ้นกับแอพลิเคชัน |
ต่อไปนี้เป็นเนื้อหาหลักของ src ไฟล์งาน / cn.uprogrammer.singlefragments / MainActivity.java ของ:
package cn.uprogrammer.singlefragment;

import android.os.Bundle;
import android.app.Activity;
import android.app.FragmentManager;
import android.app.FragmentTransaction;
import android.content.res.Configuration;

public class MainActivity extends Activity {

    @Override
    protected void onCreate(Bundle savedInstanceState) {
        super.onCreate(savedInstanceState);

        Configuration config = getResources().getConfiguration();

        FragmentManager fragmentManager = getFragmentManager();
        FragmentTransaction fragmentTransaction =
                fragmentManager.beginTransaction();

        /**
         * 检测设备方向,并做相应地操作。
         */
        if (config.orientation == Configuration.ORIENTATION_LANDSCAPE) {
            /**
             * 设备的横屏模式。
             */
            LandscapeFragment ls_fragment = new LandscapeFragment();
            fragmentTransaction.replace(android.R.id.content, ls_fragment);
        }else{
            /**
             * 设备的竖屏模式。
             */
            PortraitFragment pm_fragment = new PortraitFragment();
            fragmentTransaction.replace(android.R.id.content, pm_fragment);
        }
        fragmentTransaction.commit();
    }
}
สร้างสองไฟล์กระจัดกระจาย LandscapeFragment.java และ PortraitFragment.java ใน cn.uprogrammer.singlefragments แพคเกจ
ต่อไปนี้เป็นไฟล์ LandscapeFragment.java เนื้อหา:
package cn.uprogrammer.singlefragment;

import android.app.Fragment;
import android.os.Bundle;
import android.view.LayoutInflater;
import android.view.View;
import android.view.ViewGroup;


public class LandscapeFragment extends Fragment {

    @Override
    public View onCreateView(LayoutInflater inflater,
                             ViewGroup container, Bundle savedInstanceState) {
        /**
         * Inflate the layout for this fragment
         */
        return inflater.inflate(
                R.layout.landscape_fragment, container, false);
    }

}
ต่อไปนี้เป็นไฟล์เนื้อหา PortraitFragment.java:
package cn.uprogrammer.singlefragment;

import android.app.Fragment;
import android.os.Bundle;
import android.view.LayoutInflater;
import android.view.View;
import android.view.ViewGroup;

public class PortraitFragment extends Fragment {

    @Override
    public View onCreateView(LayoutInflater inflater,
                             ViewGroup container, Bundle savedInstanceState) {
        /**
         * Inflate the layout for this fragment
         */
        return inflater.inflate(
                R.layout.portrait_fragment, container, false);
    }
}
สร้างสองไฟล์รูปแบบ landscape_fragment.xml และ portrait_fragment.xml ใน Res ไดเรกทอรีรูปแบบ /
ต่อไปนี้เป็นไฟล์ landscape_fragment.xml เนื้อหา:
<?xml version="1.0" encoding="utf-8"?>
<LinearLayout
    xmlns:android="http://schemas.android.com/apk/res/android"
    android:orientation="vertical"
    android:layout_width="fill_parent"
    android:layout_height="fill_parent"
    android:background="#7bae16">

    <TextView
        android:layout_width="fill_parent"
        android:layout_height="wrap_content"
        android:text="@string/landscape_message"
        android:textColor="#000000"
        android:textSize="28sp" />

    <!-- More GUI components go here  -->

</LinearLayout>
ต่อไปนี้เป็นไฟล์ portrait_fragment.xml เนื้อหา:
<?xml version="1.0" encoding="utf-8"?>
<LinearLayout
    xmlns:android="http://schemas.android.com/apk/res/android"
    android:orientation="horizontal"
    android:layout_width="fill_parent"
    android:layout_height="fill_parent"
    android:background="#666666">

    <TextView
        android:layout_width="fill_parent"
        android:layout_height="wrap_content"
        android:text="@string/portrait_message"
        android:textColor="#000000"
        android:textSize="28sp" />

    <!-- More GUI components go here  -->

</LinearLayout>
ต่อไปนี้เป็นเนื้อหาของ Res / รูปแบบ / ไฟล์ activity_main.xml ซึ่งมีสองชิ้นนี้:
<?xml version="1.0" encoding="utf-8"?>
<LinearLayout xmlns:android="http://schemas.android.com/apk/res/android"
    xmlns:tools="http://schemas.android.com/tools"
    android:layout_width="fill_parent"
    android:layout_height="fill_parent"
    android:orientation="horizontal">

    <fragment
        android:id="@+id/landscape_fragment"
        android:layout_weight="1"
        android:layout_width="0dp"
        android:layout_height="match_parent" />

    <fragment
        android:id="@+id/portrait_fragment"
        android:layout_weight="2"
        android:layout_width="0dp"
        android:layout_height="match_parent" />

</LinearLayout>
ตรวจสอบให้แน่ใจ Res / ค่า / ไฟล์ strings.xml มีดังต่อไปนี้:
<?xml version="1.0" encoding="utf-8"?>
<resources>
<string name="app_name">Single Fragment</string>
<string name="hello_world">Hello world!</string>
<string name="action_settings">Settings</string>
<string name="landscape_message">这是横屏模式碎片</string>
<string name="portrait_message">这是竖屏模式碎片</string>
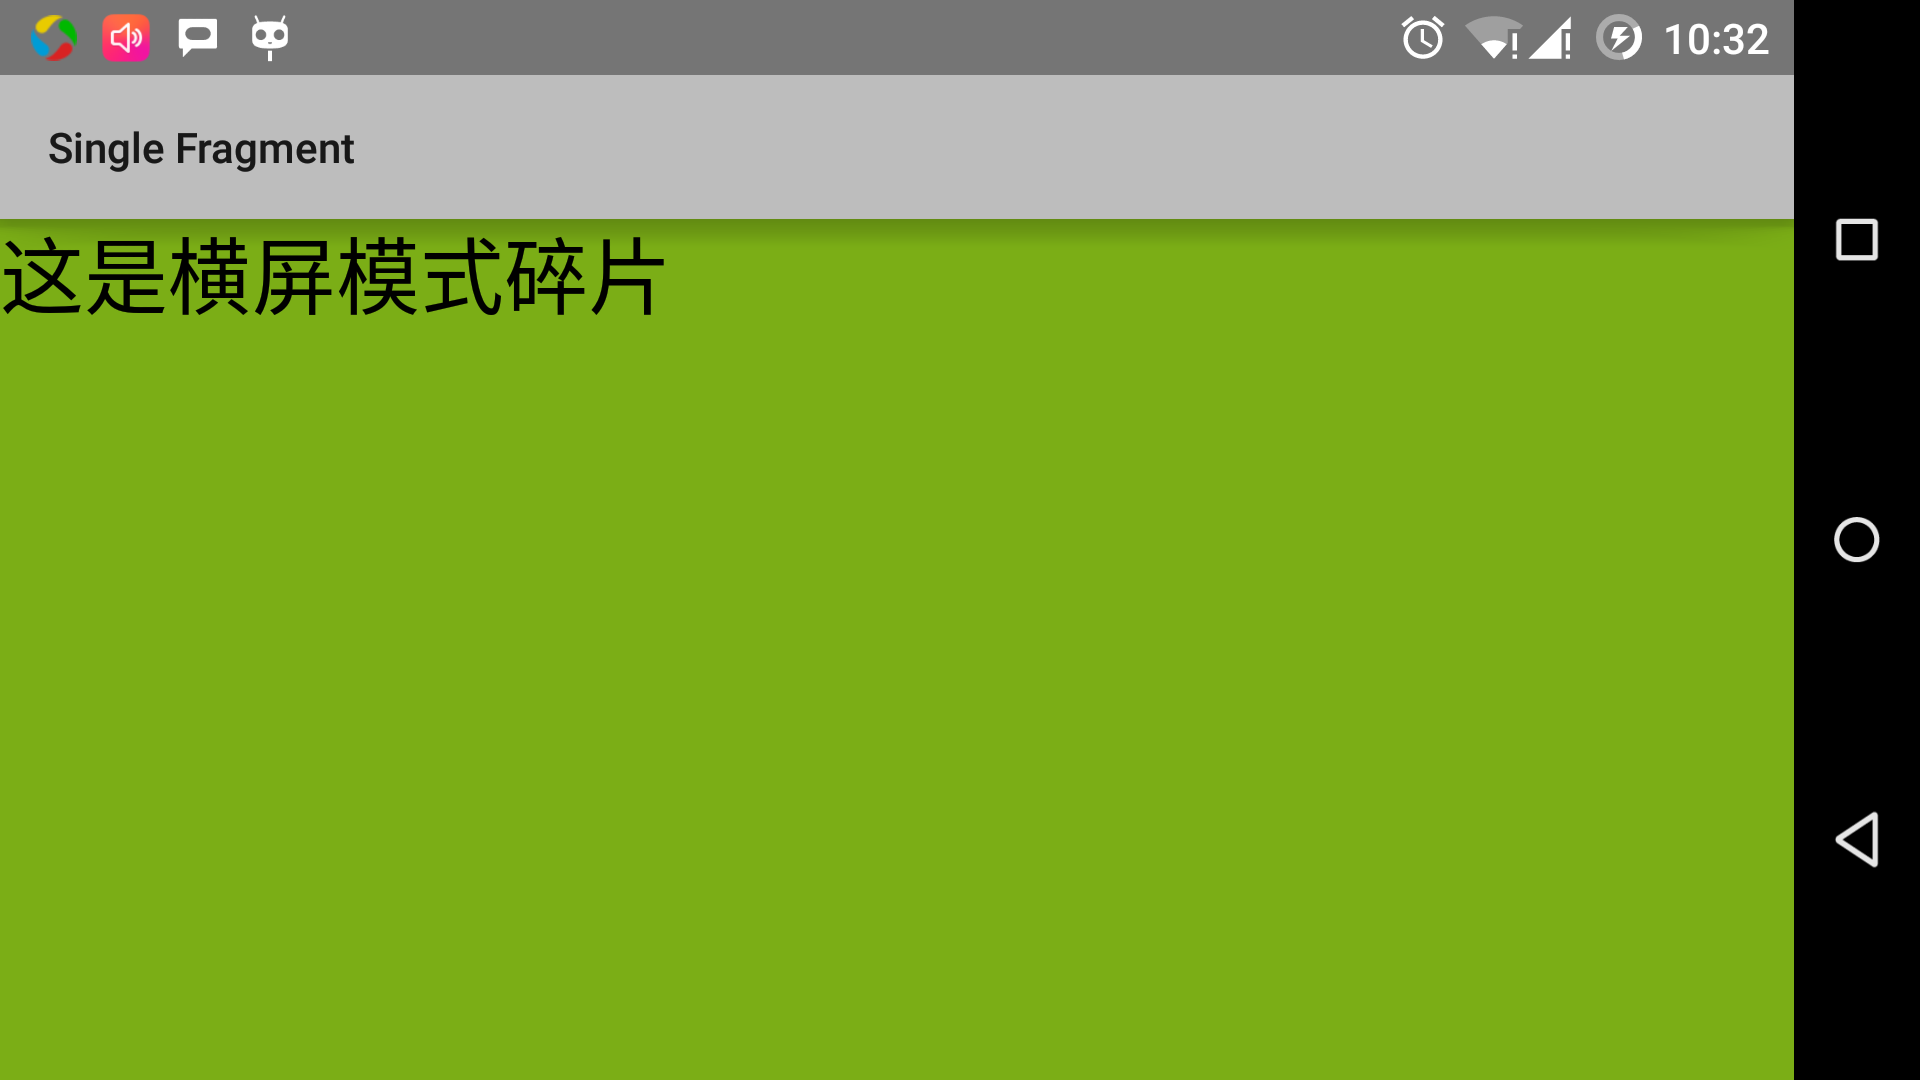
</resources> ขอเพียงแค่เรียกใช้การปรับเปลี่ยนการใช้งานเศษเดี่ยว ผมถือว่าคุณได้สร้างสภาพแวดล้อม AVD ระหว่างการติดตั้ง เปิดโครงการในไฟล์ที่ใช้งานให้คลิกบนแถบเครื่องมือ  ไอคอนเพื่อเรียกใช้โปรแกรมประยุกต์ใน Android สตูดิโอ สตูดิโอหุ่นยนต์ติดตั้งโปรแกรมประยุกต์บน AVD และเริ่มมัน หากทุกอย่างไปได้ดีก็จะปรากฏบนหน้าต่างจำลองดังต่อไปนี้:

สอดคล้องกับต่อไปนี้เพื่อเปลี่ยนทิศทางของโหมดหน้าจอจำลองนี้:
- Fn + ควบคุม + F11 เปลี่ยนแปลง Mac ในแนวนอนเป็นแนวตั้งและในทางกลับกัน
- Ctrl + F11 หน้าต่าง
- Ctrl + F11 บน Linux
เมื่อคุณเปลี่ยนโหมดคุณจะเห็นโหมดแนวนอนที่เหมาะสมสำหรับการสำนึกของหน้า:
ด้วยวิธีนี้คุณสามารถที่เหตุการณ์เดียวกันโดยใช้ชิ้นส่วนที่ไม่ได้ใช้เพื่อให้บรรลุการเชื่อมต่อที่แตกต่างกัน คุณสามารถสร้างอินเตอร์เฟซให้เป็นไปตามความต้องการของคุณโดยใช้ชนิดที่แตกต่างกันขององค์ประกอบอินเตอร์เฟซ