เจตนา Android (เจตนา) และฟิลเตอร์ (Filter)
เจตนา Android เป็นคำอธิบายที่เป็นนามธรรมของการดำเนินการที่จะดำเนินการ มันสามารถเริ่มต้นจากกิจกรรม startActivity ที่ broadcastIntent ส่งออกอากาศไปยังสนใจส่วนประกอบเครื่องรับวิทยุใด ๆ startService (เจตนา) หรือ bindService (เจตนา ServiceConnection, int) ในการสื่อสารกับบริการหลังสิ้นสุด
ความตั้งใจของตัวเอง (วัตถุเจตนา) เป็นโครงสร้างข้อมูลเรื่อย ๆ ที่มีคำอธิบายที่เป็นนามธรรมของการดำเนินงานที่จะดำเนินการ
ตัวอย่างเช่นคุณมีงานเปิด mail ของลูกค้าและส่งอีเมลไปยังอุปกรณ์ Android ของคุณ เพื่อจุดประสงค์นี้คุณจำเป็นต้องส่งกิจกรรม ACTION_SEND กับตัวเลือกที่เหมาะสมในการประมวลผลความตั้งใจ Android ระบุตัวเลือกที่กำหนดอินเตอร์เฟซที่เหมาะสมเพื่อให้ผู้ใช้ตัดสินใจว่าจะส่งข้อมูลข้อความของเขา
Intent email = new Intent(Intent.ACTION_SEND, Uri.parse("mailto:"));
email.putExtra(Intent.EXTRA_EMAIL, recipients);
email.putExtra(Intent.EXTRA_SUBJECT, subject.getText().toString());
email.putExtra(Intent.EXTRA_TEXT, body.getText().toString());
startActivity(Intent.createChooser(email, "Choose an email client from..."));
StartActivity ไวยากรณ์สำหรับการเรียกวิธีการดังกล่าวจะเปิดกิจกรรม E-mail ผลของการใช้รหัสที่มีลักษณะเช่นนี้
ตัวอย่างเช่นคุณได้ใช้งานคุณจะต้องเปิด URL บนอุปกรณ์ Android ผ่านเบราว์เซอร์ เพื่อจุดประสงค์นี้ส่งกิจกรรมของคุณ ACTION_WEB_SEARCH ความตั้งใจที่จะประมวลผล Android ความตั้งใจที่จะเปิด URL ที่กำหนดในเบราว์เซอร์ของคุณ ความตั้งใจที่จะประมวลผลโดยการวิเคราะห์ชุดของกิจกรรมและเลือกที่เหมาะสมที่สุดหนึ่งในกิจกรรมที่คุณตั้งใจในกรณีนี้เว็บเบราว์เซอร์กิจกรรม ความตั้งใจที่จะผ่านการประมวลผลที่อยู่หน้าเว็บของคุณกับเว็บเบราว์เซอร์และเปิดกิจกรรมบนเว็บเบราว์เซอร์
String q = "http://www.uprogrammer.cn";
Intent intent = new Intent(Intent.ACTION_WEB_SEARCH );
intent.putExtra(SearchManager.QUERY, q);
startActivity(intent);
ตัวอย่างข้างต้นจะพบ "www.uprogrammer.cn" เครื่องมือค้นหาบน Android และให้ผลการค้นหาในกิจกรรมคำหลัก
สำหรับแต่ละองค์ประกอบ - กิจกรรมบริการรับออกอากาศมีกลไกอิสระในการถ่ายทอดความตั้งใจ
| เลขที่ | วิธีการและรายละเอียด |
|---|---|
| 1 | Context.startActivity (): ความตั้งใจที่จะส่งผ่านไปยังวิธีการที่ใช้ในการเริ่มต้นกิจกรรมใหม่หรือมีกิจกรรมที่มีอยู่ที่จะทำอะไรใหม่ ๆ |
| 2 | Context.startService (): ความตั้งใจที่จะส่งผ่านไปยังวิธีการเริ่มต้นบริการหรือข้อมูลใหม่เพื่อบริการถาวร |
| 3 | Context.sendBroadcast (): ความตั้งใจที่จะส่งผ่านไปยังวิธีการที่ข้อมูลจะถูกส่งไปรับการออกอากาศที่สนใจทุกท่าน |
วัตถุเจตนา
วัตถุเจตนาเป็นแพคเกจของข้อมูลสำหรับองค์ประกอบที่ได้รับความตั้งใจเป็นระบบ Android ได้รับข้อมูล
วัตถุเจตนารวมถึงองค์ประกอบดังต่อไปนี้ขึ้นอยู่กับสิ่งที่คุณต้องการในการสื่อสารหรือดำเนินการ
แอคชั่น (action)
ก็คือการเป็นส่วนหนึ่งของความตั้งใจของวัตถุที่มันจะแสดงเป็นสตริง ออกอากาศเจตนาดำเนินการในเหตุการณ์ที่เกิดขึ้นจะมีการรายงาน การดำเนินการส่วนใหญ่จะกำหนดวิธีการส่วนที่เหลือของความตั้งใจที่จะจัด ระดับความตั้งใจที่จะกำหนดชุดของค่าคงที่การกระทำที่สอดคล้องกับความตั้งใจที่แตกต่างกัน นี่คือ การกระทำของ Android มาตรฐานเจตนา รายการ
วัตถุเจตนาในการเคลื่อนไหวที่สามารถตั้งค่าโดย setAction () วิธีการโดย getAction () วิธีการอ่าน
ข้อมูล (ข้อมูล)
เพิ่มข้อมูลลงในความตั้งใจของข้อกำหนดกรอง ข้อกำหนดนี้อาจจะเป็นแค่หนึ่งชนิดข้อมูล (เช่นเซลล์ชนิดแอตทริบิวต์) ซึ่งเป็น URI หรือรวมทั้งสองประเภทข้อมูลและ URI โดย URI เพื่อระบุลักษณะของส่วนที่แตกต่างกัน
แอตทริบิวต์เหล่านี้ระบุรูปแบบของ URL จะเป็นตัวเลือก แต่ยังเป็นอิสระจากกัน -
- ถ้าเจตนาที่ไม่ได้ระบุโหมดกรองอื่น ๆ URI ในสถานที่ทั้งหมดจะถูกละเว้น
- ถ้าคุณไม่ได้ระบุโฮสต์สำหรับตัวกรองที่เป็นคุณลักษณะพอร์ตและคุณลักษณะเส้นทางจะถูกละเลย
setData () วิธีเท่านั้นที่สามารถระบุข้อมูล URI, setType () เท่านั้นที่สามารถระบุชนิดของข้อมูล meta ที่ setDataAndType () สามารถระบุ URI และประเภทองค์ประกอบพร้อมกัน URI โดย getData () เพื่ออ่านประเภทโดย getType () เพื่ออ่าน
นี่คือตัวอย่างบางส่วนของชุดการกระทำ / ข้อมูล -
| เลขที่ | Action / ข้อมูลและคำอธิบาย |
|---|---|
| 1 | เนื้อหา ACTION_VIEW: // ติดต่อ / คน / 1: 1 จะแสดงข้อมูล ID ผู้ใช้ |
| 2 | เนื้อหา ACTION_DIAL: // ติดต่อ / คน / 1: แสดงเลขหมายโทรศัพท์และเติมข้อมูลผู้ใช้ 1 |
| 3 | โทร ACTION_VIEW: 123: แสดงเลขหมายโทรศัพท์และกรอกตัวเลขที่กำหนด |
| 4 | โทร ACTION_DIAL: 123: แสดงเลขหมายโทรศัพท์และกรอกตัวเลขที่กำหนด |
| 5 | เนื้อหา ACTION_EDIT: // ติดต่อ / คน / 1: แก้ไขข้อมูล ID ผู้ใช้ 1 |
| 6 | เนื้อหา ACTION_VIEW: // ติดต่อ / คน /: แสดงรายการของผู้ใช้เพื่อดู |
| 7 | ACTION_SET_WALLPAPER: เลือกการตั้งค่าการแสดงผลวอลล์เปเปอร์ |
| 8 | ACTION_SYNC: ประสานข้อมูลค่าเริ่มต้น: android.intent.action.SYNC |
| 9 | ACTION_SYSTEM_TUTORIAL: เปิดแพลตฟอร์มนิยามกวดวิชา (หรือเริ่มต้นการเริ่มต้นการสอนกวดวิชา) |
| 10 | ACTION_TIMEZONE_CHANGED: เมื่อโซนเวลาที่มีการเปลี่ยนแปลงการแจ้งเตือน |
| 11 | ACTION_UNINSTALL_PACKAGE: คุณเรียกถอนการติดตั้งเริ่มต้น |
หมวดหมู่
หมวดหมู่เป็นส่วนหนึ่งที่จำเป็นของความตั้งใจที่จะเป็นสตริงที่ประกอบด้วยข้อมูลเพิ่มเติมเกี่ยวกับชนิดของชิ้นส่วนที่จะเป็นความตั้งใจของการประมวลผลที่ addCategory () วิธีการที่มีความตั้งใจในการเพิ่มหมวดหมู่วัตถุ removeCategory () วิธีการลบก่อนที่จะเพิ่มประเภท GetCategories () ได้รับการกำหนดทั้งหมดไปยังหมวดหมู่วัตถุเจตนา นี่คือ มาตรฐาน Android เจตนาหมวดหมู่ รายการ
คุณสามารถดูส่วนต่อไปนี้ฟิลเตอร์เจตนาที่จะเข้าใจวิธีการที่เราใช้หมวดหมู่ด้วยความตั้งใจที่สอดคล้องกันเพื่อเลือกกิจกรรมที่เหมาะสม
ข้อมูลเพิ่มเติม
นี้จะถูกส่งไปประกอบในการจัดการกับความตั้งใจที่จะคีย์ข้อมูลเพิ่มเติมบรรยายในที่นี้ ชุดโดย putExtras () getExtras () วิธีการอ่าน นี่คือ มาตรฐาน Android เจตนาข้อมูลเพิ่มเติม รายการ
เครื่องหมาย
แท็กเหล่านี้เป็นส่วนที่ไม่จำเป็นของความตั้งใจที่จะแสดงให้เห็นระบบ Android วิธีการเริ่มกิจกรรมวิธีการหลังจากที่เริ่มต้นการรักษา
| เลขที่ | แท็กและคำอธิบาย |
|---|---|
| 1 | FLAG_ACTIVITY_CLEAR_TASK: ถ้าเจตนาและผ่าน Context.startActivity แท็กนี้จะทำให้เกิดงานที่มีอยู่ทั้งหมดที่เกี่ยวข้องกับกิจกรรมที่จะเคลียร์งานก่อนงานเริ่ม กิจกรรมจะเป็นรากของงานที่ว่างเปล่าทุกกิจกรรมเก่าถูกยกเลิก การใช้เครื่องหมายอาจจะรวมกับ FLAG_ACTIVITY_NEW_TASK |
| 2 | FLAG_ACTIVITY_CLEAR_TOP: ถ้าตั้งค่าสถานะนี้เหตุการณ์จะเริ่มต้นในงานที่กำลังทำงานอยู่ในขณะนี้ โรคนี้ไม่เริ่มต้นเช่นกิจกรรมใหม่กิจกรรมทั้งหมดที่มันถูกปิดตั้งใจว่านี่เป็นความตั้งใจใหม่จะถูกส่งไปยังที่มีอยู่ (ปัจจุบันอยู่ที่ด้านบน) กิจกรรม |
| 3 | FLAG_ACTIVITY_NEW_TASK: แท็กนี้ถูกใช้โดยทั่วไปสำหรับกิจกรรมดังกล่าว "เริ่มต้น" รูปแบบของพฤติกรรม: เพื่อให้ผู้ใช้ที่มีการทำงานของข้อมูลที่สามารถจะแล้วเสร็จอย่างอิสระและเริ่มต้นเด็กแยกต่างหากกิจกรรมที่สมบูรณ์ |
ชื่อตัวแทน
ชื่อวัตถุส่วนประกอบเป็นฟิลด์ตัวเลือกตัวแทนกิจกรรมบริการหรือรับสัญญาณออกอากาศระดับ หากตั้งวัตถุเจตนาจะถูกส่งไปใช้อินสแตนซ์ของชั้นที่ออกแบบมามิฉะนั้น Android ความตั้งใจอื่น ๆ ข้อมูลอื่น ๆ เพื่อค้นหาเป้าหมายที่เหมาะสม ชื่อคอมโพเนนต์โดย setComponent () setClass () หรือ setClassName () เพื่อตั้งค่า () ได้รับผ่าน getComponent
ประเภทของเจตนา
Android สนับสนุนทั้งสองประเภทของความตั้งใจ
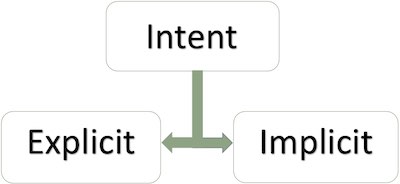
เจตนาอย่างชัดเจน
โลกภายในของความตั้งใจที่ชัดเจนในการเชื่อมต่อแอปพลิเคถ้าคุณจำเป็นต้องเชื่อมต่อกิจกรรมเพื่อกิจกรรมอื่นเราสามารถแสดงเจตนาตัวเลขต่อไปนี้แสดงให้เห็นถึงการเชื่อมต่อโดยคลิกที่ปุ่มกิจกรรมแรกกับกิจกรรมที่สอง
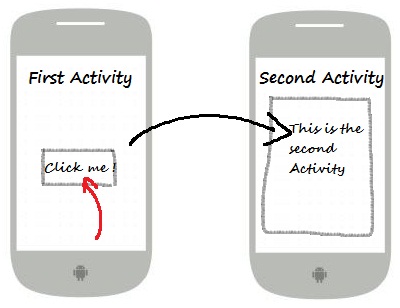
เจตนาของการกำหนดเป้าหมายองค์ประกอบโดยใช้ชื่อที่ใช้โดยทั่วไปสำหรับการประยุกต์ใช้ข้อมูลภายใน - เช่นกิจกรรม บริษัท ย่อยหรือกิจกรรมที่จะเริ่มต้นการเริ่มต้นกิจกรรมพี่น้อง ตัวอย่างเช่น:
// 通过指定类名的显式意图
Intent i = new Intent(FirstActivity.this, SecondAcitivity.class);

// 启动目标活动
startActivity(i);
เจตนาโดยปริยาย
เจตนาของเป้าหมายเหล่านี้ไม่ได้ชื่อชื่อคอมโพเนนต์โดเมนว่างเปล่า เจตนาโดยปริยายมักจะใช้เพื่อเปิดใช้งานส่วนประกอบของโปรแกรมอื่น ๆ ตัวอย่างเช่น:
Intent read1=new Intent();
read1.setAction(android.content.Intent.ACTION_VIEW);
read1.setData(ContactsContract.Contacts.CONTENT_URI);
startActivity(read1);
โค้ดข้างต้นจะได้รับผลดังต่อไปนี้:
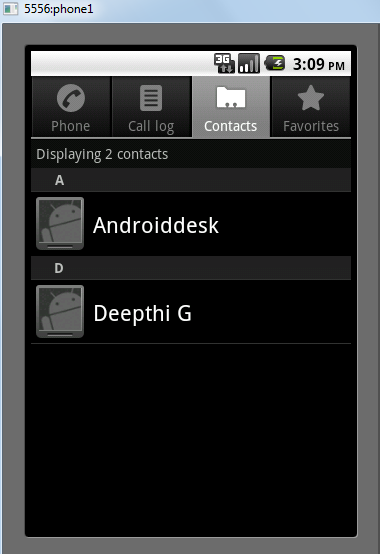
องค์ประกอบเป้าหมายได้รับความตั้งใจที่คุณสามารถใช้ getExtras () วิธีการเพื่อให้ได้ข้อมูลเพิ่มเติมส่งโดยองค์ประกอบของแหล่งที่มา ตัวอย่างเช่น:
// 在代码中的合适位置获取包对象
Bundle extras = getIntent().getExtras();

// 通过键解压数据
String value1 = extras.getString("Key1");
String value2 = extras.getString("Key2");
ตัวอย่าง
ตัวอย่างต่อไปนี้แสดงให้เห็นถึงความตั้งใจในการใช้งานของ Android ที่จะเปิดตัวความหลากหลายของ Android คุณสมบัติในตัวโปรแกรม
| ขั้นตอน | ลักษณะ |
|---|---|
| 1 | โดยใช้ Android Studio IDE ในการสร้างโปรแกรม Android ชื่อตัวกรองความตั้งใจแพคเกจชื่อ cn.uprogrammer.intentfilter เมื่อคุณสร้างโครงการให้แน่ใจว่า SDK เป้าหมายและรวบรวมกับรุ่นล่าสุดของ Android SDK ใช้ API ขั้นสูง |
| 2 | แก้ไขไฟล์ src / cn.uprogrammer.intentfilter / MainActivity.java และเพิ่มรหัสกำหนดสองฟังในการที่สอดคล้องกันสองปุ่ม "เบราว์เซอร์เริ่มต้น" และ "เริ่มการโทร" |
| 3 | ปรับเปลี่ยนความละเอียด / รูปแบบ / รูปแบบไฟล์ activity_main.xml รูปแบบออนไลน์เพิ่มสามปุ่ม |
| 4 | เปิดตัวโปรแกรมจำลอง Android เพื่อเรียกใช้โปรแกรมประยุกต์และตรวจสอบผลของการเปลี่ยนแปลงที่เกิดขึ้นกับแอพลิเคชัน |
ต่อไปนี้เป็นเนื้อหาของไฟล์ src / cn.uprogrammer.intentfilter / MainActivity.java นี้:
package cn.uprogrammer.intentfilter;

import android.content.Intent;
import android.net.Uri;
import android.support.v7.app.ActionBarActivity;
import android.os.Bundle;
import android.view.Menu;
import android.view.MenuItem;
import android.view.View;
import android.widget.Button;


public class MainActivity extends ActionBarActivity {
    Button b1,b2;

    @Override
    protected void onCreate(Bundle savedInstanceState) {
        super.onCreate(savedInstanceState);
        setContentView(R.layout.activity_main);

        b1=(Button)findViewById(R.id.button);
        b1.setOnClickListener(new View.OnClickListener() {

            @Override
            public void onClick(View v) {
                Intent i = new Intent(android.content.Intent.ACTION_VIEW, Uri.parse("http://www.uprogrammer.cn"));
                startActivity(i);
            }
        });

        b2=(Button)findViewById(R.id.button2);
        b2.setOnClickListener(new View.OnClickListener() {
            @Override
            public void onClick(View v) {
                Intent i = new Intent(android.content.Intent.ACTION_VIEW,Uri.parse("tel:9510300000"));
                startActivity(i);
            }
        });
    }

    @Override
    public boolean onCreateOptionsMenu(Menu menu) {
        getMenuInflater().inflate(R.menu.menu_main, menu);
        return true;
    }

    @Override
    public boolean onOptionsItemSelected(MenuItem item) {
        // Handle action bar item clicks here. The action bar will
        // automatically handle clicks on the Home/Up button, so long
        // as you specify a parent activity in AndroidManifest.xml.

        int id = item.getItemId();

        //noinspection SimplifiableIfStatement
        if (id == R.id.action_settings) {
            return true;
        }
        return super.onOptionsItemSelected(item);
    }
}
นี่คือเนื้อหาของ Res / รูปแบบไฟล์ / activity_main.xml นี้:
<RelativeLayout xmlns:android="http://schemas.android.com/apk/res/android"
    xmlns:tools="http://schemas.android.com/tools"
    android:layout_width="match_parent"
    android:layout_height="match_parent"
    android:paddingLeft="@dimen/activity_horizontal_margin"
    android:paddingRight="@dimen/activity_horizontal_margin"
    android:paddingTop="@dimen/activity_vertical_margin"
    android:paddingBottom="@dimen/activity_vertical_margin"
    tools:context=".MainActivity">

    <TextView
        android:id="@+id/textView1"
        android:layout_width="wrap_content"
        android:layout_height="wrap_content"
        android:text="意图实例"
        android:layout_alignParentTop="true"
        android:layout_centerHorizontal="true"
        android:textSize="30dp" />

    <TextView
        android:id="@+id/textView2"
        android:layout_width="wrap_content"
        android:layout_height="wrap_content"
        android:text="www.uprogrammer.cn"
        android:textColor="#ff87ff09"
        android:textSize="30dp"
        android:layout_below="@+id/textView1"
        android:layout_centerHorizontal="true" />

    <ImageButton
        android:layout_width="wrap_content"
        android:layout_height="wrap_content"
        android:id="@+id/imageButton"
        android:src="@drawable/ic_launcher"
        android:layout_below="@+id/textView2"
        android:layout_centerHorizontal="true" />

    <EditText
        android:layout_width="wrap_content"
        android:layout_height="wrap_content"
        android:id="@+id/editText"
        android:layout_below="@+id/imageButton"
        android:layout_alignRight="@+id/imageButton"
        android:layout_alignEnd="@+id/imageButton" />

    <Button
        android:layout_width="wrap_content"
        android:layout_height="wrap_content"
        android:text="启动浏览器"
        android:id="@+id/button"
        android:layout_alignTop="@+id/editText"
        android:layout_alignRight="@+id/textView1"
        android:layout_alignEnd="@+id/textView1"
        android:layout_alignLeft="@+id/imageButton"
        android:layout_alignStart="@+id/imageButton" />

    <Button
        android:layout_width="wrap_content"
        android:layout_height="wrap_content"
        android:text="启动电话"
        android:id="@+id/button2"
        android:layout_below="@+id/button"
        android:layout_alignLeft="@+id/button"
        android:layout_alignStart="@+id/button"
        android:layout_alignRight="@+id/textView2"
        android:layout_alignEnd="@+id/textView2" />
</RelativeLayout>
นี่คือเนื้อหาของ Res / ค่า / สตริง / XML ที่กำหนดคงที่สองใหม่
<?xml version="1.0" encoding="utf-8"?>
<resources>
   <string name="app_name">Intent filter</string>
   <string name="action_settings">Settings</string>
</resources>
ต่อไปนี้เป็นเนื้อหา AndroidManifest.xml ค่าเริ่มต้น:
<?xml version="1.0" encoding="utf-8"?>
<manifest xmlns:android="http://schemas.android.com/apk/res/android"
    package="cn.uprogrammer.intentfilter"
    android:versionCode="1"
    android:versionName="1.0" >

    <uses-sdk
        android:minSdkVersion="8"
        android:targetSdkVersion="22" />

    <application
        android:allowBackup="true"
        android:icon="@drawable/ic_launcher"
        android:label="@string/app_name"
        android:theme="@style/Base.Theme.AppCompat" >

        <activity
            android:name="cn.uprogrammer.intentfilter.MainActivity"
            android:label="@string/app_name" >

            <intent-filter>
                <action android:name="android.intent.action.MAIN" />
                <category android:name="android.intent.category.LAUNCHER" />
            </intent-filter>

        </activity>

    </application>
</manifest>
ขอเพียงแค่เรียกใช้การปรับเปลี่ยนการใช้งานตัวกรองความตั้งใจ ผมถือว่าคุณได้สร้างสภาพแวดล้อม AVD ระหว่างการติดตั้ง เปิดโครงการในไฟล์ที่ใช้งานให้คลิกบนแถบเครื่องมือ  ไอคอนเพื่อเรียกใช้โปรแกรมประยุกต์ใน Android สตูดิโอ สตูดิโอหุ่นยนต์ติดตั้งโปรแกรมประยุกต์บน AVD และเริ่มมัน หากทุกอย่างไปได้ดีก็จะปรากฏบนหน้าต่างจำลองดังต่อไปนี้:
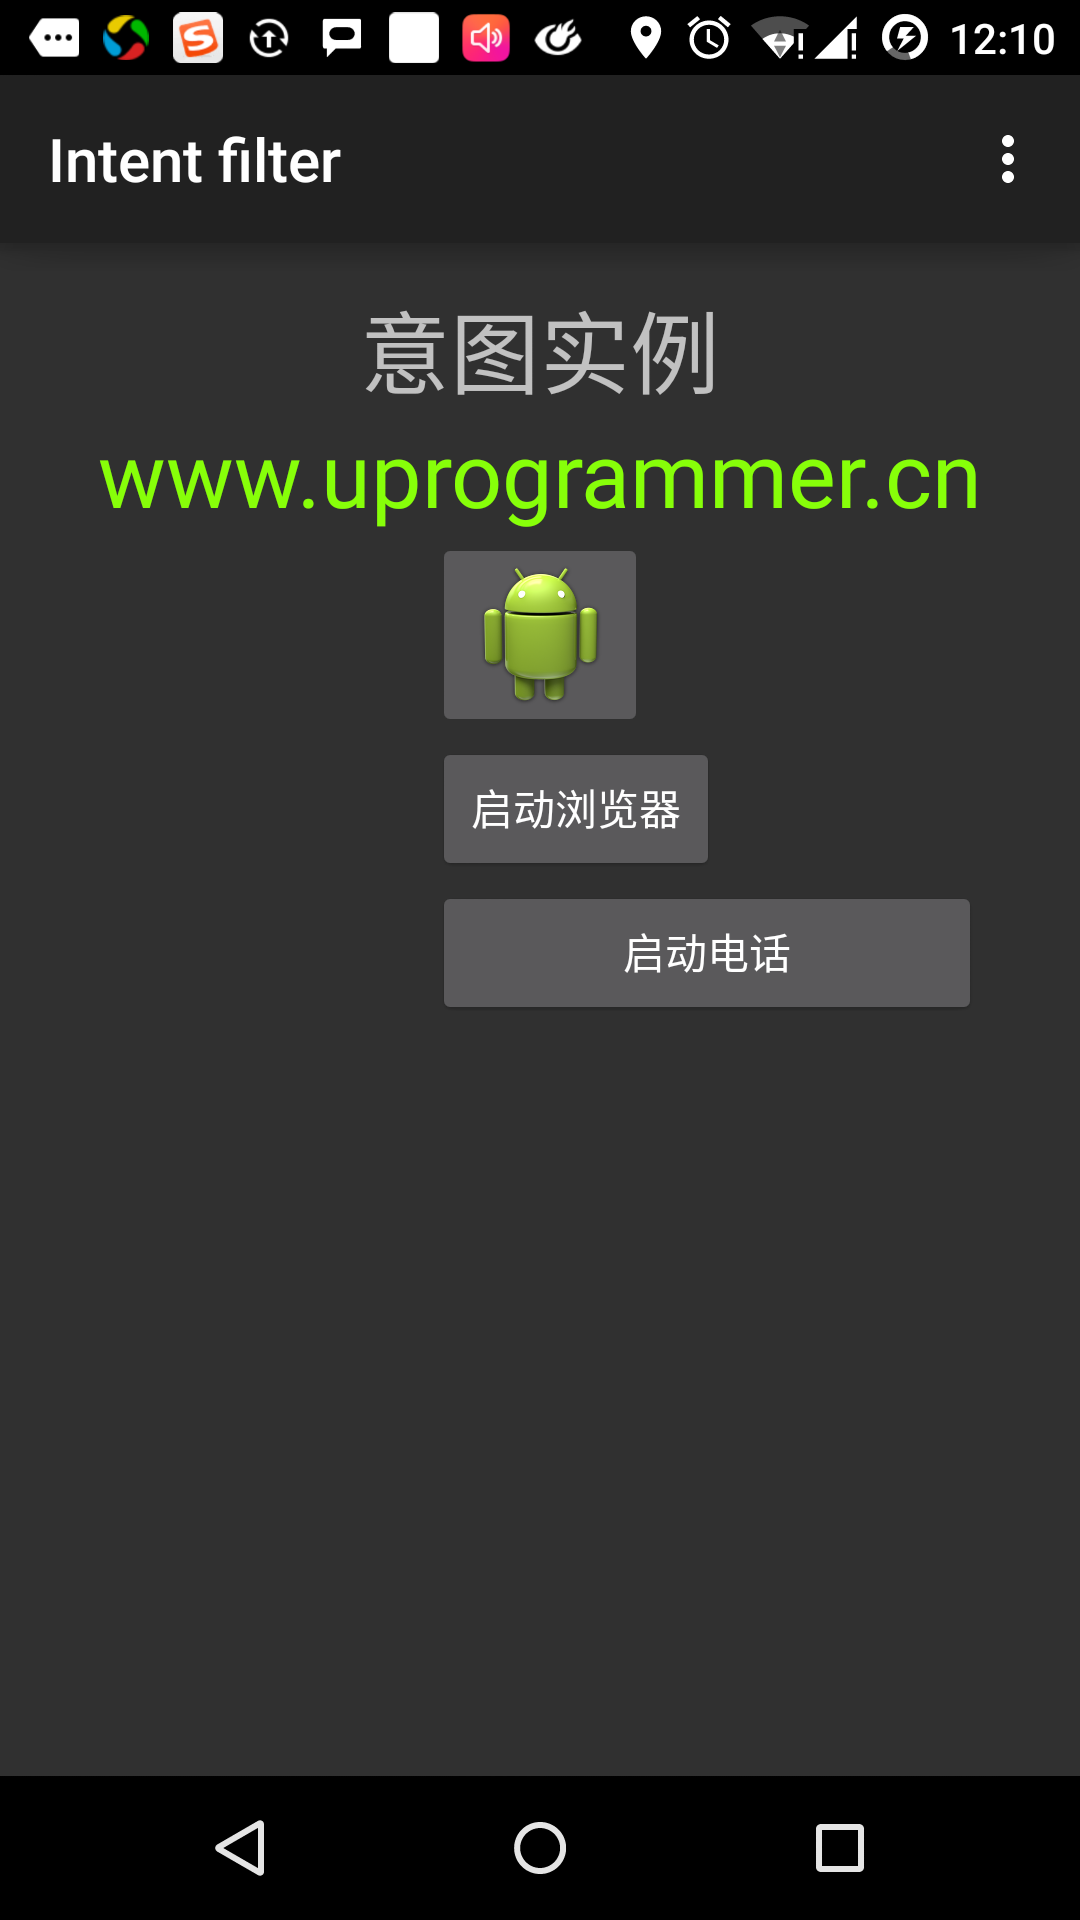
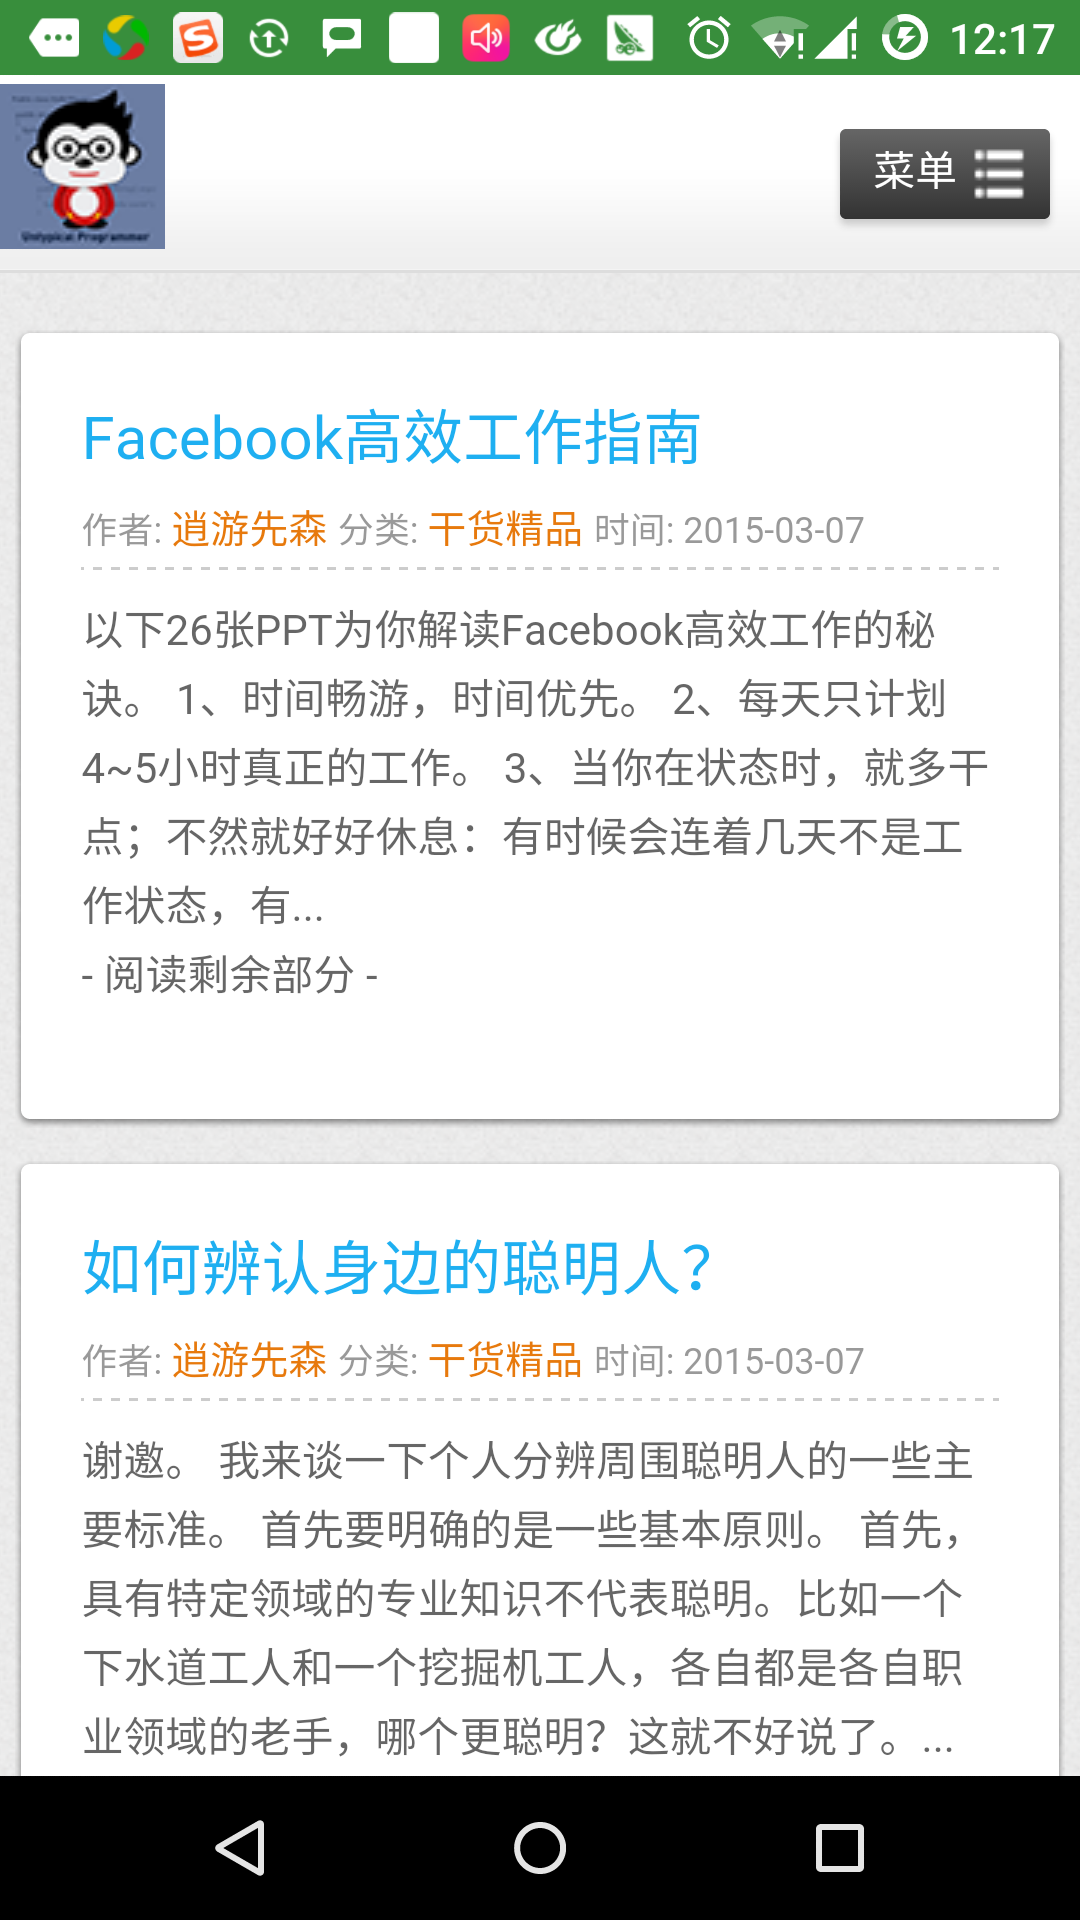
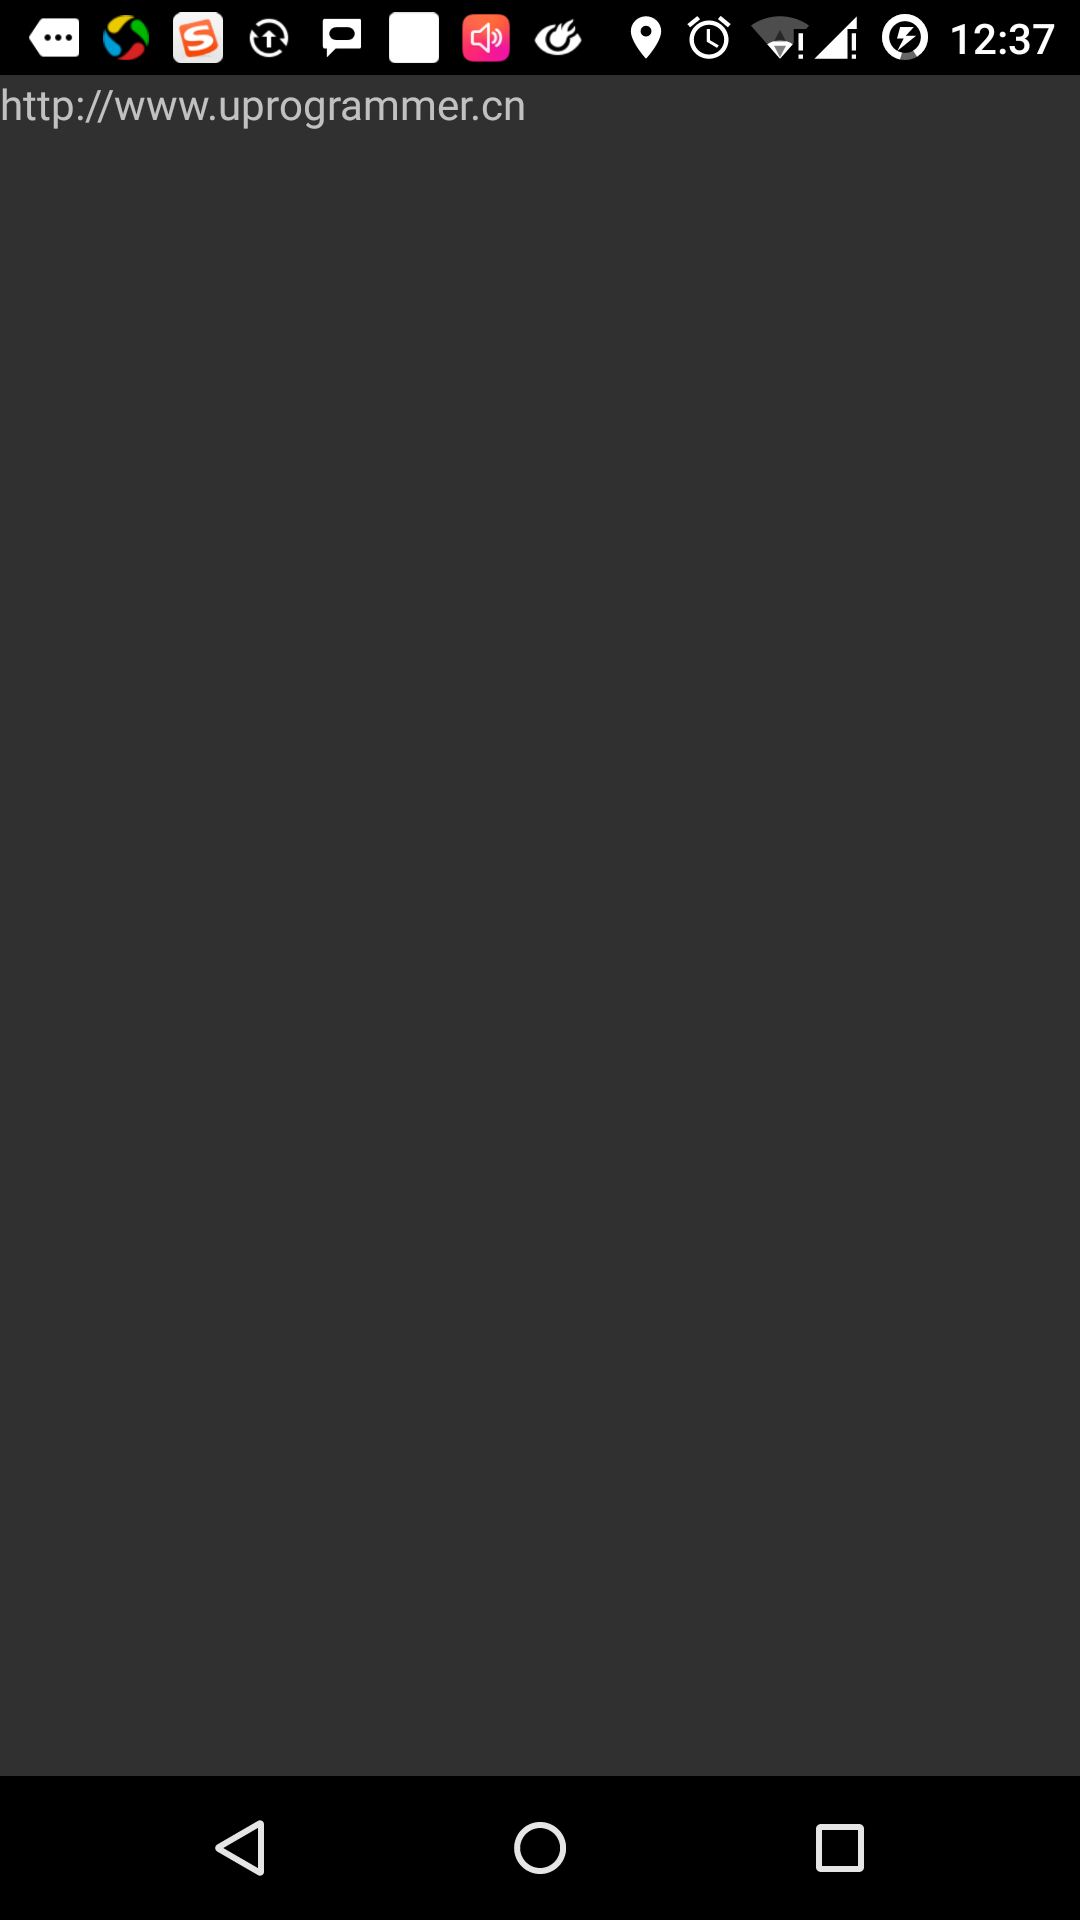
ตอนนี้คลิกที่ปุ่ม "Start เบราว์เซอร์" ซึ่งจะเปิดตัวเบราว์เซอร์ขึ้นอยู่กับการกำหนดค่าและแสดง http://www.uprogrammer.cn ดังนี้
ในลักษณะที่คล้ายกันคุณสามารถคลิกที่ปุ่ม "Start โทร" เพื่อเปิดอินเตอร์เฟซที่โทรศัพท์ซึ่งจะช่วยให้คุณสามารถกดหมายเลขโทรศัพท์ที่ได้รับ
กรองเจตนา
คุณได้เห็นวิธีการใช้ความตั้งใจที่จะเรียกกิจกรรมอื่น ระบบปฏิบัติการ Android ใช้ฟิลเตอร์เพื่อระบุช่วงของกิจกรรมการให้บริการและรับการออกอากาศจัดการเจตนาต้องการความช่วยเหลือของเจตนาระบุประเภทการดำเนินการรูปแบบข้อมูล การใช้งาน <เจตนากรอง> องค์ประกอบในแฟ้มแสดงรายการที่ระบุไว้ในการดำเนินการที่สอดคล้องกันหมวดหมู่และชนิดของข้อมูลในการจัดกิจกรรมการให้บริการและรับการออกอากาศ
ตัวอย่างต่อไปนี้แสดงให้เห็นว่าเป็นส่วนหนึ่งของไฟล์ AndroidManifest.xml ระบุโดยการกระทำของ cn.uprogrammer.intentfilter.CustomActivity ใช้งานสามารถตั้งค่าประเภทและสายข้อมูล:
<activity android:name=".CustomActivity"
   android:label="@string/app_name">

   <intent-filter>
      <action android:name="android.intent.action.VIEW" />
      <action android:name="com.example.MyApplication.LAUNCH" />
      <category android:name="android.intent.category.DEFAULT" />
      <data android:scheme="http" />
   </intent-filter>

</activity>
เมื่อมีกิจกรรมที่มีการกำหนดข้างต้นกรองกิจกรรมอื่น ๆ ที่คุณสามารถใช้วิธีการต่อไปจะก่อให้เกิดเหตุการณ์นี้ ใช้ android.intent.action.VIEW ใช้การดำเนินการและให้ cn.uprogrammer.intentfilter.LAUNCH หมวด android.intent.category.DEFAULT
องค์ประกอบระบุกิจกรรมที่จะเรียกว่าชนิดข้อมูลคาดว่า ตัวอย่างข้างต้นกิจกรรมที่กำหนดเองที่ต้องการข้อมูลจาก "http: //" ที่เริ่มต้น
นี้เป็นกรณีที่ผ่านการกรองจะมีจุดมุ่งหมายที่จะส่งมอบให้กับหลายกิจกรรมหรือบริการที่ผู้ใช้จะถูกขอให้เริ่มต้นการชุมนุม ถ้าคุณไม่พบองค์ประกอบเป้าหมายข้อยกเว้นเกิดขึ้น
ก่อนที่จะเรียกเหตุการณ์ที่ชุดของการทดสอบตรวจสอบ Android A:
- ตัวกรอง <เจตนากรอง> ต้องรายการหนึ่งหรือมากกว่าหนึ่งของการดำเนินการต้องไม่ว่างเปล่า; ประกอบด้วยอย่างน้อยหนึ่งตัวกรอง
องค์ประกอบมิฉะนั้นจะปิดกั้นเจตนาทั้งหมด ถ้าการกระทำหลาย ๆ ที่กล่าวถึง, Android ก่อนที่จะเรียกการกระทำที่จะพยายามเพื่อให้ตรงกับการจัดกิจกรรมดังกล่าวอยู่ในนั้น - ตัวกรอง <เจตนากรอง> 0 อาจจะอยู่ในรายการหนึ่งหรือมากกว่าหนึ่งประเภท หากไม่มีหมวดหมู่เป็นที่กล่าวถึง, Android ผ่านการทดสอบนี้ถ้ามีหลายประเภทที่กล่าวถึงได้มีไว้ตามประเภทของการทดสอบการจำแนกประเภทของแต่ละวัตถุเจตนาจะต้องตรงกับตัวกรองในหมวดหมู่นี้
- แต่ละ องค์ประกอบสามารถระบุ URI และประเภทข้อมูล (องค์ประกอบประเภทสื่อ) มีคุณสมบัติที่แยกเป็นส่วนหนึ่งของแต่ละ URI: โครงการโฮสต์พอร์ตและเส้นทาง และชนิดของความตั้งใจที่จะรวมถึง URI เพียงชนิดตรงกับบางประเภทของตัวกรองจดทะเบียนประเภทข้อมูลผ่านส่วนการทดสอบ
ตัวอย่าง
ตัวอย่างต่อไปนี้การปรับเปลี่ยนของตัวอย่างข้างต้นบาง ที่นี่เราจะดูว่ามีความตั้งใจที่กำหนดไว้ที่จะเรียกทั้งสองเหตุการณ์, Android วิธีการแก้ปัญหาความขัดแย้ง; วิธีการใช้ฟิลเตอร์เพื่อเรียกกิจกรรมที่กำหนดเองถ้ามีความตั้งใจที่จะกำหนดกิจกรรมที่เหมาะสมจะมีความผิดปกติไม่มี
| ขั้นตอน | คำอธิบาย |
|---|---|
| 1 | โดยใช้ Android Studio IDE ในการสร้างโปรแกรม Android ชื่อตัวกรองความตั้งใจแพคเกจชื่อ cn.uprogrammer.intentfilter เมื่อคุณสร้างโครงการให้แน่ใจว่า SDK เป้าหมายและรวบรวมกับรุ่นล่าสุดของ Android SDK ใช้ API ขั้นสูง |
| 2 | แก้ไขไฟล์ src / cn.uprogrammer.intentfilter / MainActivity.java เพิ่มรหัสเพื่อกำหนดสามฟังสามปุ่มที่สอดคล้องกับรูปแบบที่กำหนดไว้ในเอกสาร |
| 3 | เพิ่มไฟล์ src / cn.uprogrammer.intentfilter / CustomActivity.java จะรวมถึงกิจกรรมที่สามารถเป็นสายความตั้งใจที่แตกต่างกัน |
| 4 | ปรับเปลี่ยนความละเอียด / รูปแบบ / activity_main.xml ไฟล์รูปแบบเชิงเส้นเพิ่มสามปุ่ม |
| 5 | เพิ่ม Res / lauout / custom_view.xml ไฟล์รูปแบบเพียงแค่เพิ่ม |
| 6 | แก้ไขไฟล์ AndroidManifest.xml เพิ่ม <เจตนากรอง> ความหมายของกฎระเบียบที่มีเจตนาที่จะก่อให้เกิดกิจกรรมที่กำหนดเอง |
| 7 | เปิดตัวโปรแกรมจำลอง Android เพื่อเรียกใช้โปรแกรมประยุกต์และตรวจสอบผลของการเปลี่ยนแปลงที่เกิดขึ้นกับแอพลิเคชัน |
ต่อไปนี้เป็นเนื้อหาของ src / cn.uprogrammer.intentfilter / MainActivity.java ของ:
package cn.uprogrammer.intentfilter;

import android.content.Intent;
import android.net.Uri;
import android.support.v7.app.ActionBarActivity;
import android.os.Bundle;
import android.view.Menu;
import android.view.MenuItem;
import android.view.View;
import android.widget.Button;


public class MainActivity extends ActionBarActivity {
    Button b1,b2,b3;

    @Override
    protected void onCreate(Bundle savedInstanceState) {
        super.onCreate(savedInstanceState);
        setContentView(R.layout.activity_main);
        b1=(Button)findViewById(R.id.button);

        b1.setOnClickListener(new View.OnClickListener() {

            @Override
            public void onClick(View v) {
                Intent i = new Intent(android.content.Intent.ACTION_VIEW,Uri.parse("http://www.uprogrammer.cn"));
                startActivity(i);
            }
        });

        b2=(Button)findViewById(R.id.button2);
        b2.setOnClickListener(new View.OnClickListener() {

            @Override
            public void onClick(View v) {
                Intent i = new Intent("cn.uprogrammer.intentfilter.LAUNCH",Uri.parse("http://www.uprogrammer.cn"));
                startActivity(i);
            }
        });

        b3=(Button)findViewById(R.id.button3);
        b3.setOnClickListener(new View.OnClickListener() {

            @Override
            public void onClick(View v) {
                Intent i = new Intent("cn.uprogrammer.intentfilter.LAUNCH",Uri.parse("https://www.uprogrammer.cn"));
                startActivity(i);
            }
        });
    }

    @Override
    public boolean onCreateOptionsMenu(Menu menu) {
        // Inflate the menu; this adds items to the action bar if it is present.
        getMenuInflater().inflate(R.menu.menu_main, menu);
        return true;
    }

    @Override
    public boolean onOptionsItemSelected(MenuItem item) {
        // Handle action bar item clicks here. The action bar will
        // automatically handle clicks on the Home/Up button, so long
        // as you specify a parent activity in AndroidManifest.xml.

        int id = item.getItemId();

        //noinspection SimplifiableIfStatement
        if (id == R.id.action_settings) {
            return true;
        }
        return super.onOptionsItemSelected(item);
    }
}
นี่คือสิ่งที่ src / cn.uprogrammer.intentfilter / CustomActivity.java ของ:
package cn.uprogrammer.intentfilter;

import android.app.Activity;
        import android.net.Uri;
        import android.os.Bundle;
        import android.widget.TextView;

public class CustomActivity extends Activity {
    @Override
    public void onCreate(Bundle savedInstanceState) {
        super.onCreate(savedInstanceState);
        setContentView(R.layout.custom_view);
        TextView label = (TextView) findViewById(R.id.show_data);
        Uri url = getIntent().getData();
        label.setText(url.toString());
    }
}
นี่คือเนื้อหาของ Res / รูปแบบ / activity_main.xml ของ:
<RelativeLayout xmlns:android="http://schemas.android.com/apk/res/android"
    xmlns:tools="http://schemas.android.com/tools"
    android:layout_width="match_parent"
    android:layout_height="match_parent"
    android:paddingLeft="@dimen/activity_horizontal_margin"
    android:paddingRight="@dimen/activity_horizontal_margin"
    android:paddingTop="@dimen/activity_vertical_margin"
    android:paddingBottom="@dimen/activity_vertical_margin"
    tools:context=".MainActivity">

    <TextView
        android:id="@+id/textView1"
        android:layout_width="wrap_content"
        android:layout_height="wrap_content"
        android:text="意图实例"
        android:layout_alignParentTop="true"
        android:layout_centerHorizontal="true"
        android:textSize="30dp" />

    <TextView
        android:id="@+id/textView2"
        android:layout_width="wrap_content"
        android:layout_height="wrap_content"
        android:text="www.uprogrammer.cn"
        android:textColor="#ff87ff09"
        android:textSize="30dp"
        android:layout_below="@+id/textView1"
        android:layout_centerHorizontal="true" />

    <ImageButton
        android:layout_width="wrap_content"
        android:layout_height="wrap_content"
        android:id="@+id/imageButton"
        android:src="@drawable/ic_launcher"
        android:layout_below="@+id/textView2"
        android:layout_centerHorizontal="true" />

    <EditText
        android:layout_width="wrap_content"
        android:layout_height="wrap_content"
        android:id="@+id/editText"
        android:layout_below="@+id/imageButton"
        android:layout_alignRight="@+id/imageButton"
        android:layout_alignEnd="@+id/imageButton" />

    <Button
        android:layout_width="wrap_content"
        android:layout_height="wrap_content"
        android:text="通过View动作启动浏览器"
        android:id="@+id/button"
        android:layout_alignTop="@+id/editText"
        android:layout_alignRight="@+id/textView1"
        android:layout_alignEnd="@+id/textView1"
        android:layout_alignLeft="@+id/imageButton"
        android:layout_alignStart="@+id/imageButton" />

    <Button
        android:layout_width="wrap_content"
        android:layout_height="wrap_content"
        android:text="通过Launch动作启动浏览器"
        android:id="@+id/button2"
        android:layout_below="@+id/button"
        android:layout_alignLeft="@+id/button"
        android:layout_alignStart="@+id/button"
        android:layout_alignRight="@+id/textView2"
        android:layout_alignEnd="@+id/textView2" />

    <Button
        android:layout_width="wrap_content"
        android:layout_height="wrap_content"
        android:text="异常情况"
        android:id="@+id/button3"
        android:layout_below="@+id/button2"
        android:layout_alignLeft="@+id/button2"
        android:layout_alignStart="@+id/button2"
        android:layout_alignRight="@+id/textView2"
        android:layout_alignEnd="@+id/textView2" />

</RelativeLayout>
นี่คือเนื้อหาของ Res / รูปแบบไฟล์ / custom_view.xml นี้:
<?xml version="1.0" encoding="utf-8"?>
<LinearLayout xmlns:android="http://schemas.android.com/apk/res/android"
   android:orientation="vertical"
   android:layout_width="fill_parent"
   android:layout_height="fill_parent">

   <TextView android:id="@+id/show_data"
      android:layout_width="fill_parent"
      android:layout_height="400dp"/>

</LinearLayout>
นี่คือเนื้อหาของ Res / ค่า / ไฟล์ strings.xml นี้:
<?xml version="1.0" encoding="utf-8"?>
<resources>
   <string name="app_name">My Application</string>
   <string name="action_settings">Settings</string>
</resources>
นี่คือเนื้อหาของไฟล์ AndroidManifest.xml นี้:
<?xml version="1.0" encoding="utf-8"?>
<manifest xmlns:android="http://schemas.android.com/apk/res/android"
    package="cn.uprogrammer.intentfilter"
    android:versionCode="1"
    android:versionName="1.0" >

    <uses-sdk
        android:minSdkVersion="8"
        android:targetSdkVersion="22" />

    <application
        android:allowBackup="true"
        android:icon="@drawable/ic_launcher"
        android:label="@string/app_name"
        android:theme="@style/Base.Theme.AppCompat" >

        <activity
            android:name="cn.uprogrammer.intentfilter.MainActivity"
            android:label="@string/app_name" >

            <intent-filter>
                <action android:name="android.intent.action.MAIN" />
                <category android:name="android.intent.category.LAUNCHER" />
            </intent-filter>

        </activity>

        <activity android:name="cn.uprogrammer.intentfilter.CustomActivity"
            android:label="@string/app_name">

        <intent-filter>
            <action android:name="android.intent.action.VIEW" />
            <action android:name="cn.uprogrammer.intentfilter.LAUNCH" />
            <category android:name="android.intent.category.DEFAULT" />
            <data android:scheme="http" />
        </intent-filter>

        </activity>

    </application>
</manifest>
ขอเพียงแค่เรียกใช้การปรับเปลี่ยนการใช้งานตัวกรองความตั้งใจ ผมถือว่าคุณได้สร้างสภาพแวดล้อม AVD ระหว่างการติดตั้ง เปิดโครงการในไฟล์ที่ใช้งานให้คลิกบนแถบเครื่องมือ ไอคอนเพื่อเรียกใช้โปรแกรมประยุกต์ใน Android สตูดิโอ สตูดิโอหุ่นยนต์ติดตั้งโปรแกรมประยุกต์บน AVD และเริ่มมัน หากทุกอย่างไปได้ดีก็จะปรากฏบนหน้าต่างจำลองดังต่อไปนี้:
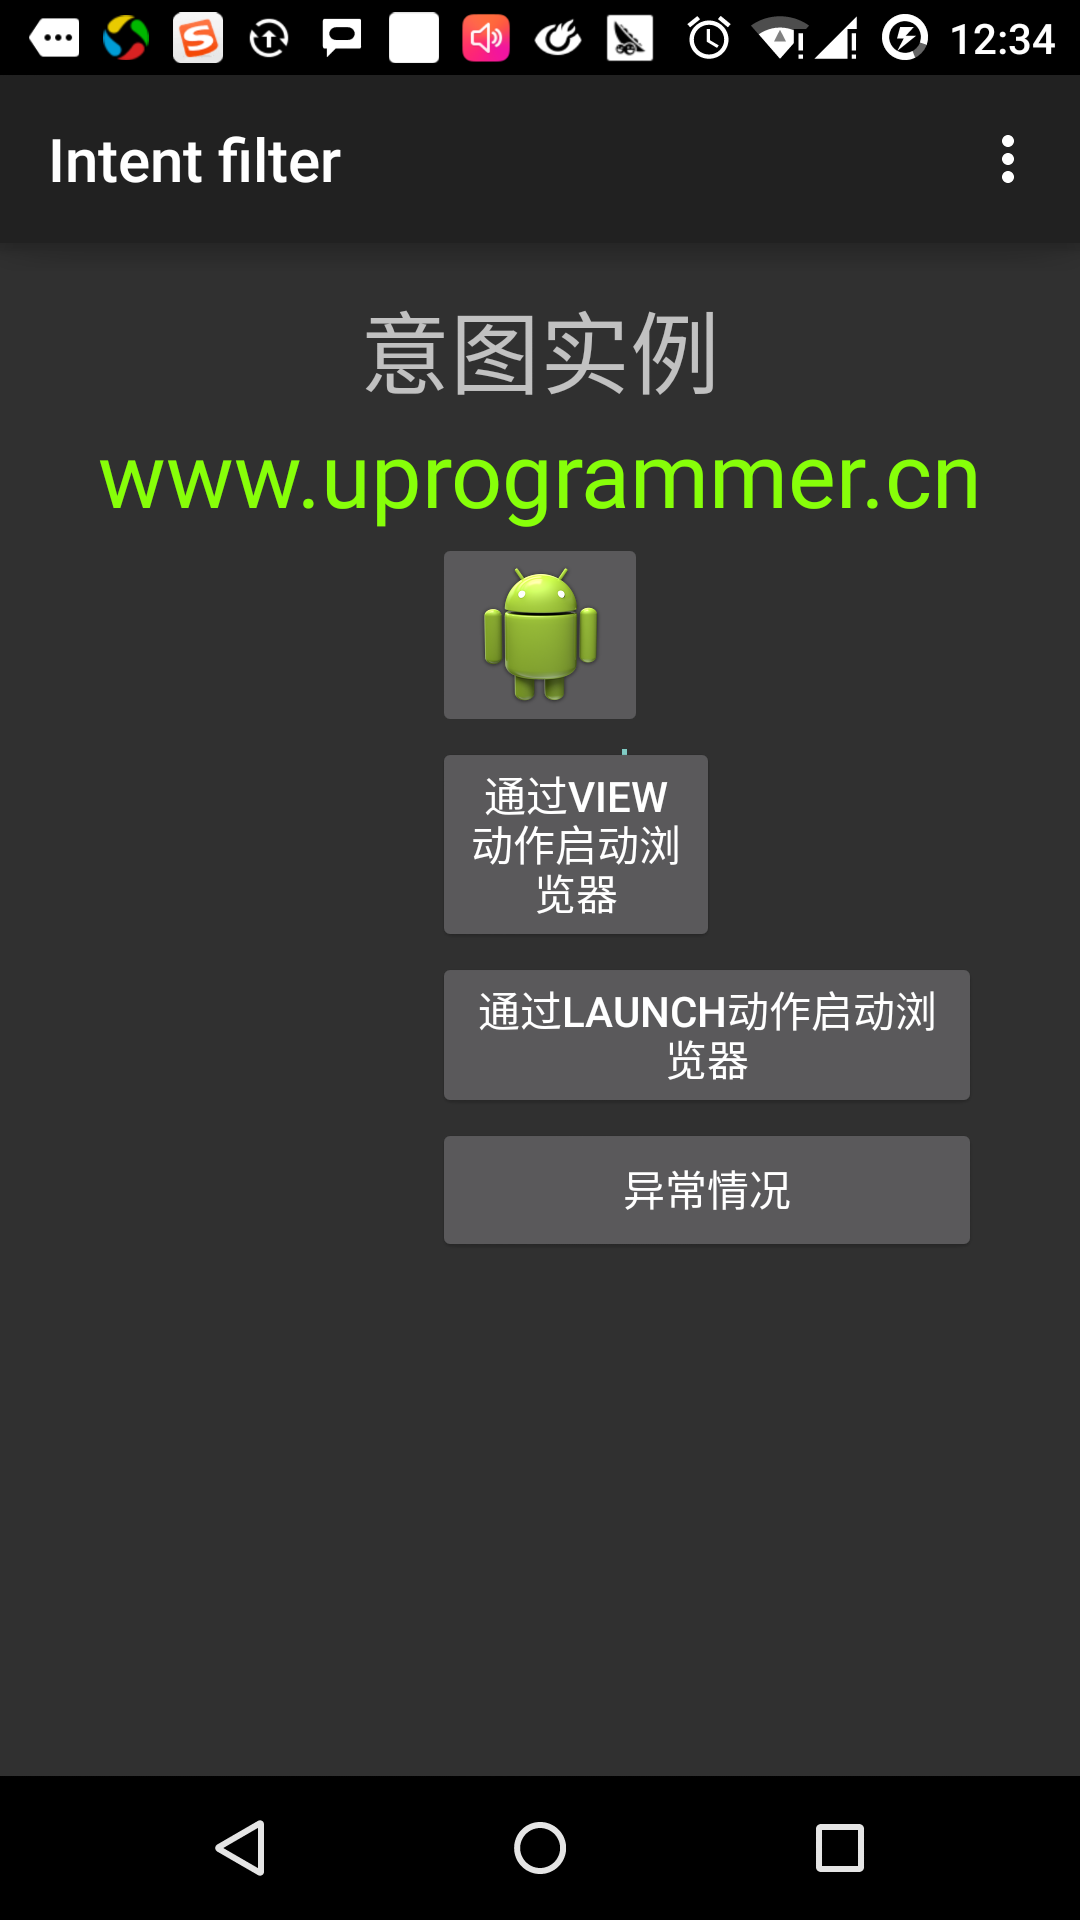
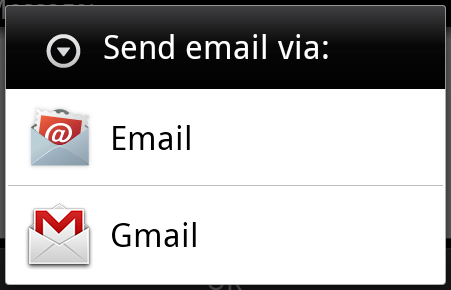
คลิกที่ปุ่มแรก "ใช้มุมมองการดำเนินการที่จะเริ่มต้นเบราว์เซอร์." ที่นี่เรากำหนดกิจกรรมของเราเองมี "android.intent.action.VIEW" และระบบ Android ได้รับการกำหนดให้สอดคล้องกับการดำเนินการเริ่มต้นดูใช้งานเพื่อเริ่มต้นเว็บเบราว์เซอร์, Android แสดงตัวเลือกต่อไปนี้เพื่อเลือกสิ่งที่คุณต้องการที่จะเริ่มต้น กิจกรรม:
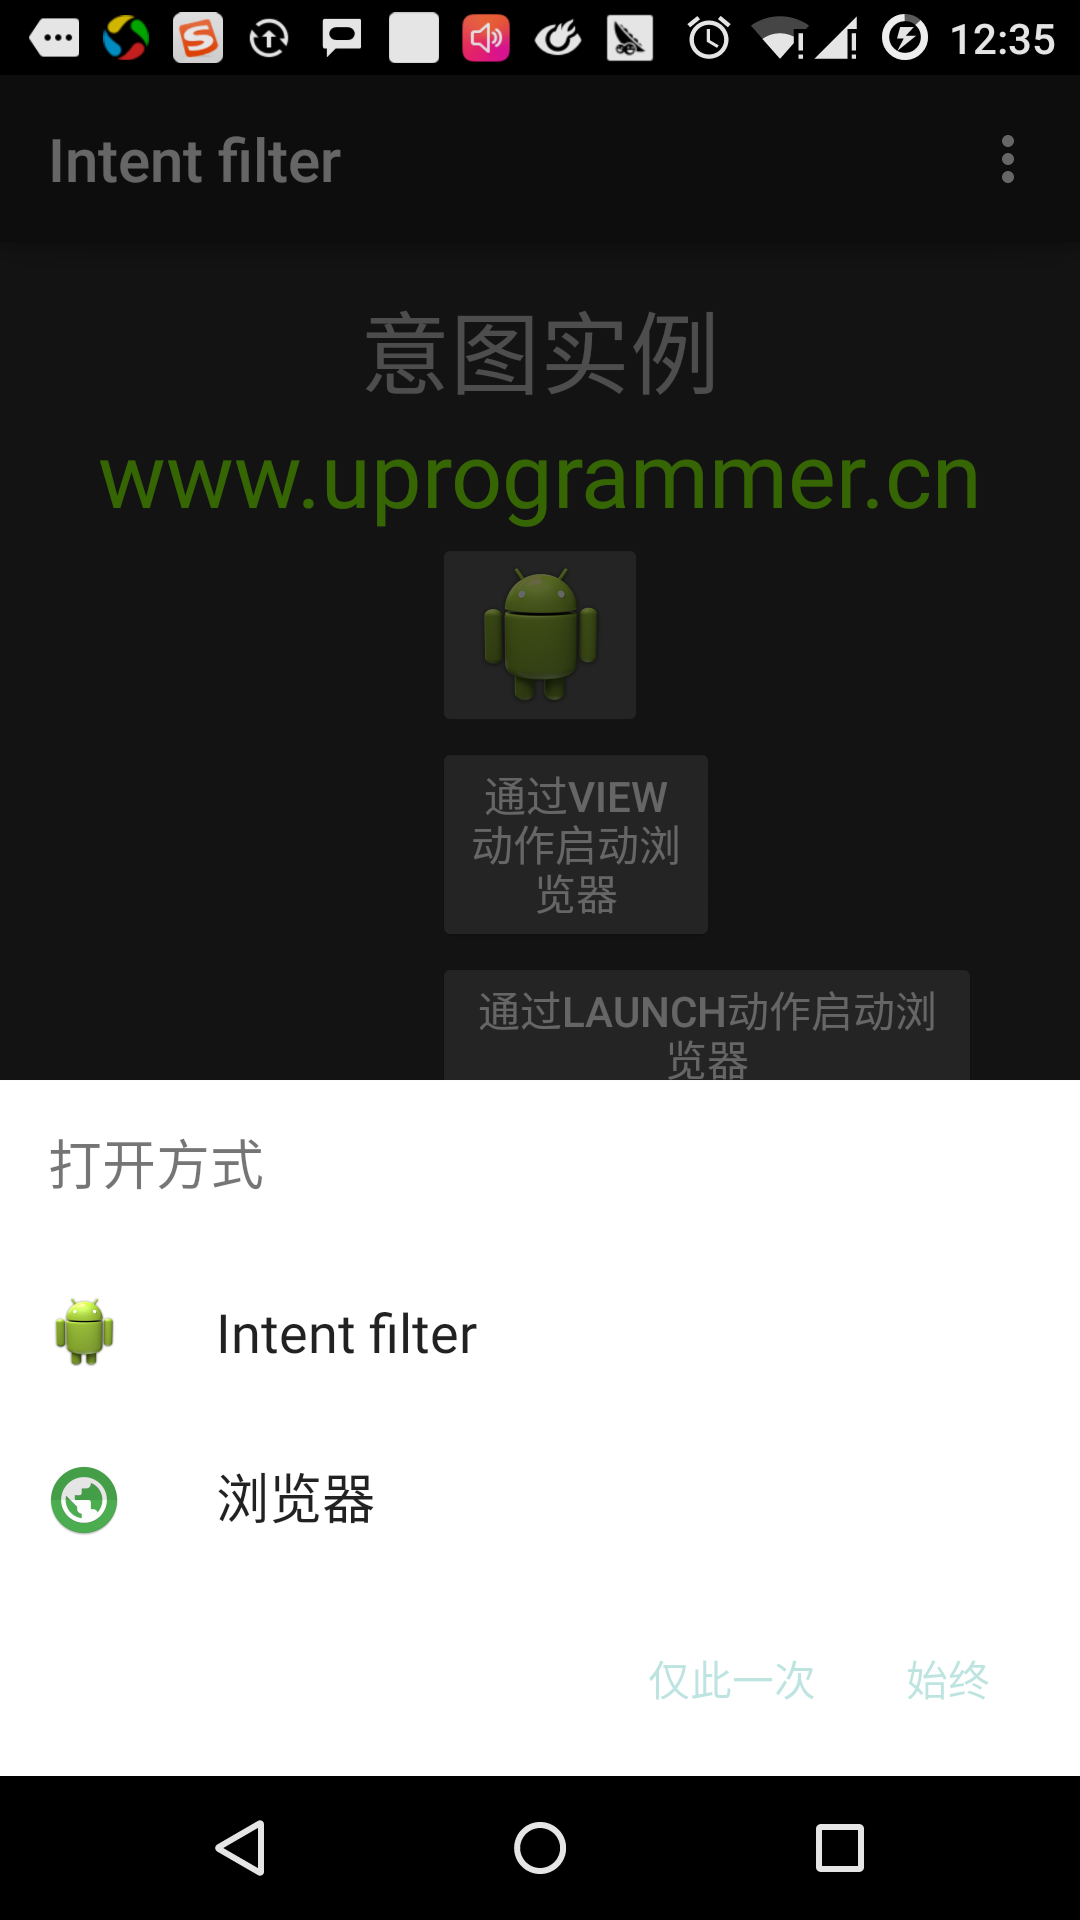
หากคุณเลือกที่เบราว์เซอร์, Android จะเปิดตัวเว็บเบราเซอร์และเว็บไซต์ www.uprogrammer.cn เปิด หากคุณเลือกตัวเลือก IntentDemo, Android จะเริ่ม CustomActivity เหตุการณ์ไม่ได้ทำอะไรเพียงแค่การจับภาพและแสดงข้อมูลที่ส่งผ่าน TextView
ตอนนี้ผ่านปุ่มย้อนกลับและคลิกที่ "ดำเนินการเปิดตัวโดยเริ่มต้นเบราว์เซอร์" ปุ่มที่ Android ใช้ตัวกรองเพื่อเลือกกิจกรรมที่กำหนดไว้และก็เริ่มต้นทำกิจกรรมที่กำหนดเอง
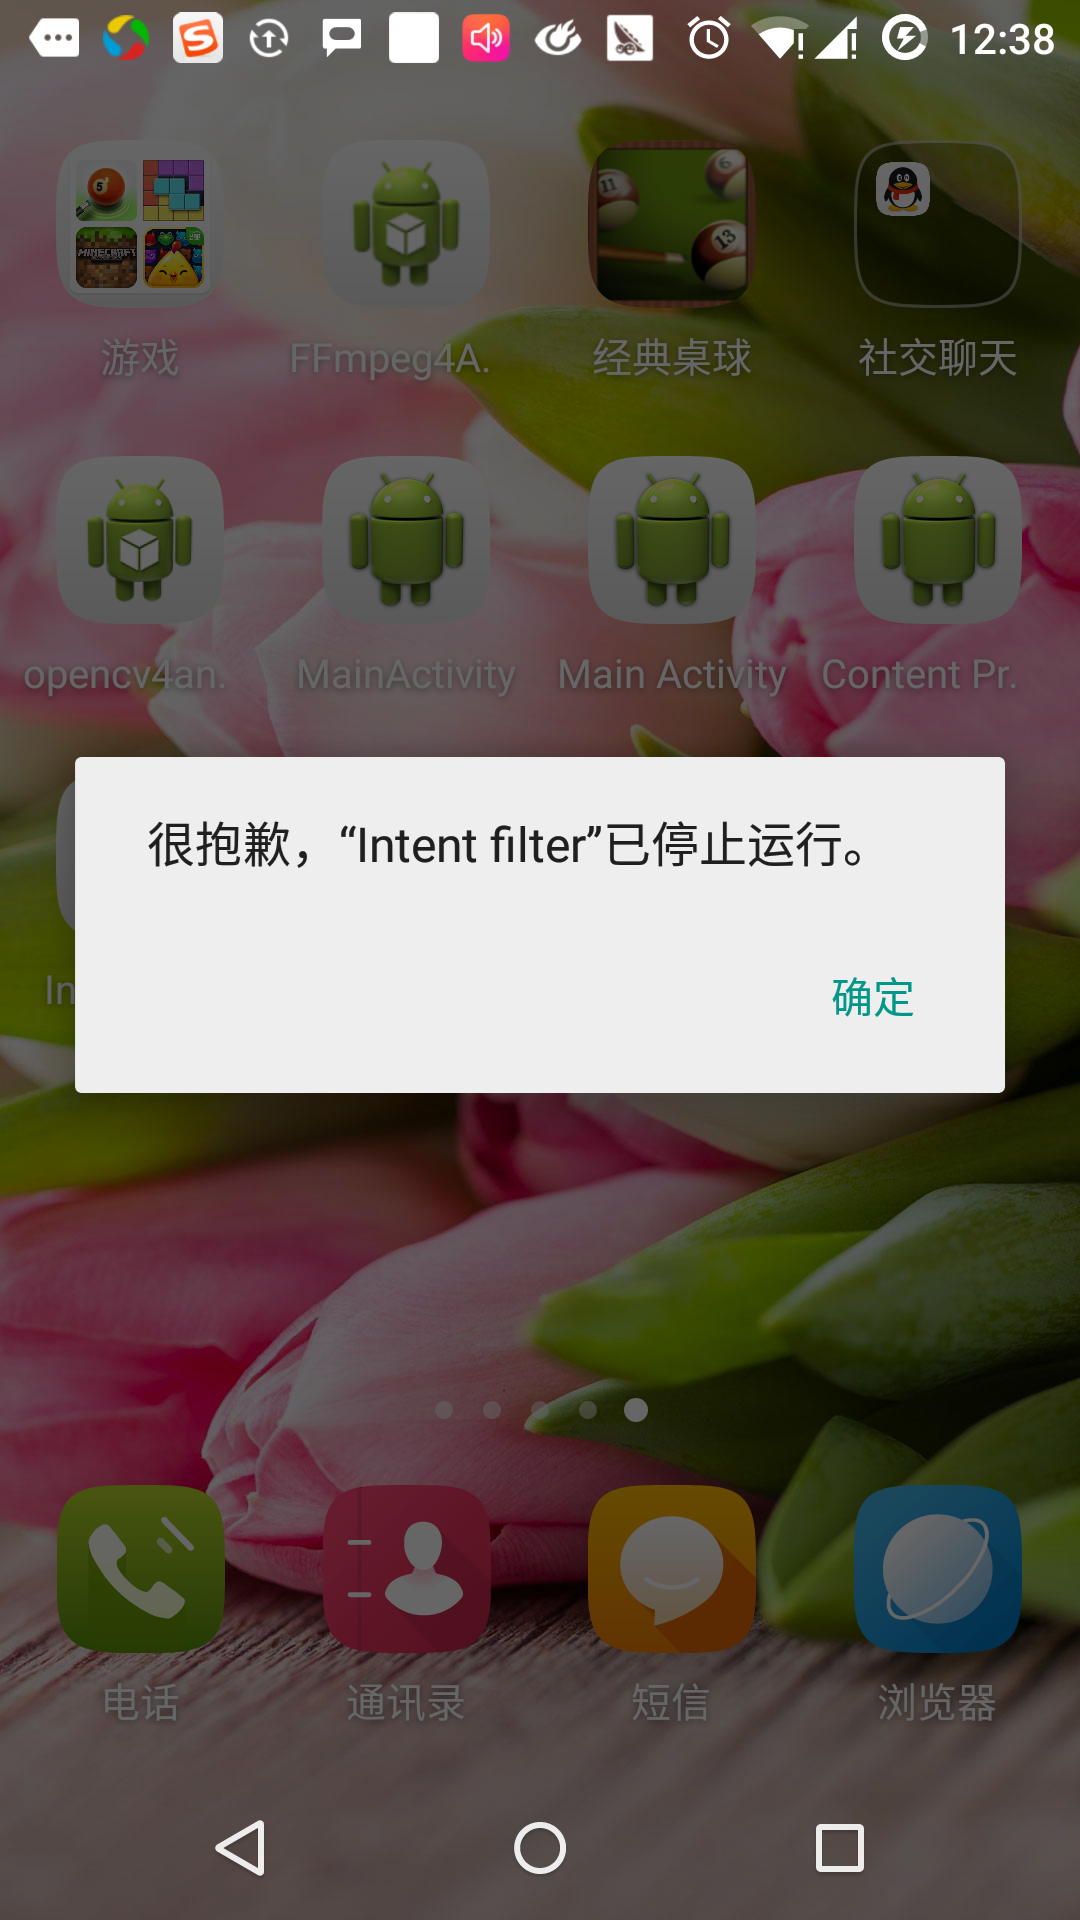
อีกครั้งใช้ปุ่มย้อนกลับเพื่อกลับไปและคลิกที่ปุ่ม "เงื่อนไขพิเศษ" พยายามหาคนที่เจตนาของ Android ที่กำหนดโดยตัวกรองที่มีประสิทธิภาพ แต่ไม่สามารถหาคำนิยามของกิจกรรมที่มีประสิทธิภาพ เพราะเราใช้ HTTPS แทนข้อมูล HTTP และได้รับการดำเนินการที่ถูกต้องเมื่อ Android สร้างข้อยกเว้น ดังต่อไปนี้: